| (16 intermediate revisions by 7 users not shown) | |||
| Line 1: | Line 1: | ||
| ⚫ | |||
| − | {{Stub}} |
||
| + | <gallery type="slideshow"> |
||
| ⚫ | |||
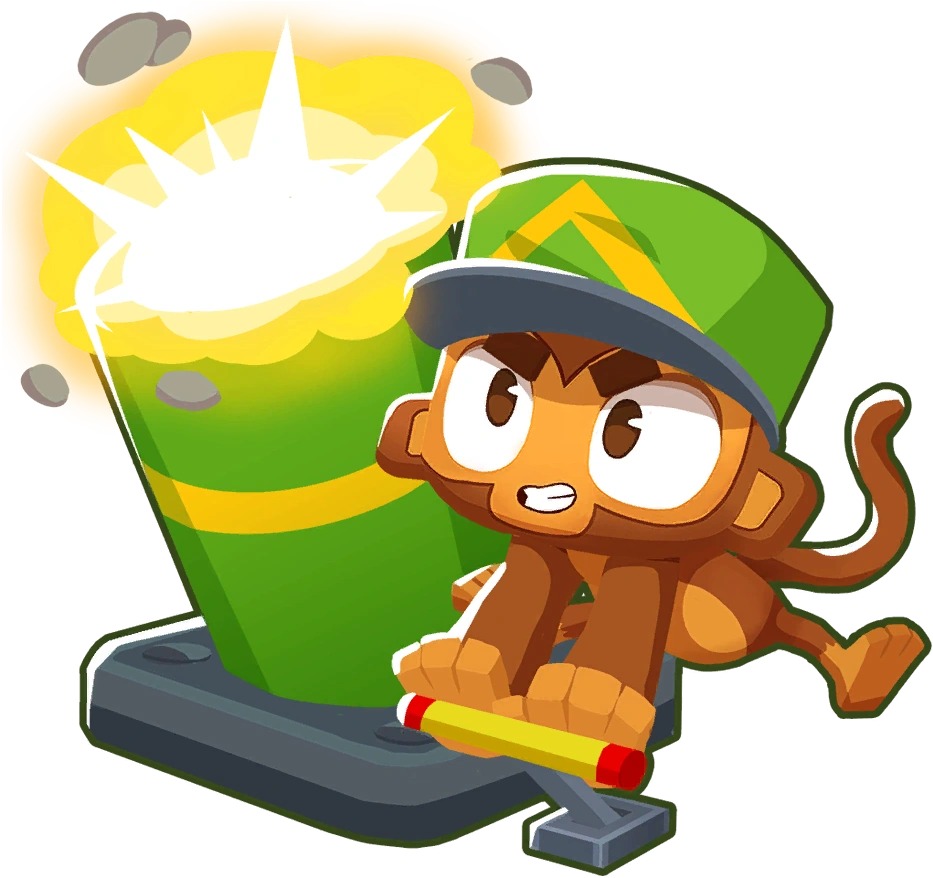
| + | BTD1 Bigger Bombs upgrade button.PNG|BTD1/BTD2 upgrade |
||
| ⚫ | |||
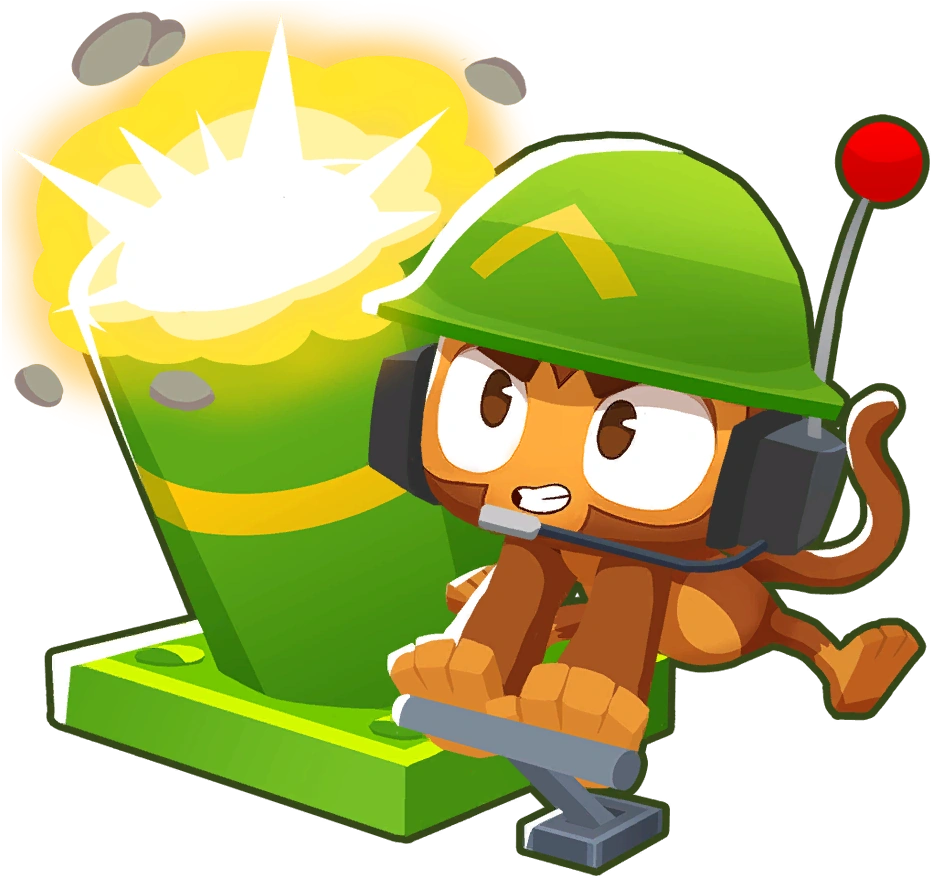
| + | Stronger Signal BTD3.png|BTD3 upgrade |
||
| ⚫ | |||
| + | Absolute 0.PNG|BTD5 upgrade |
||
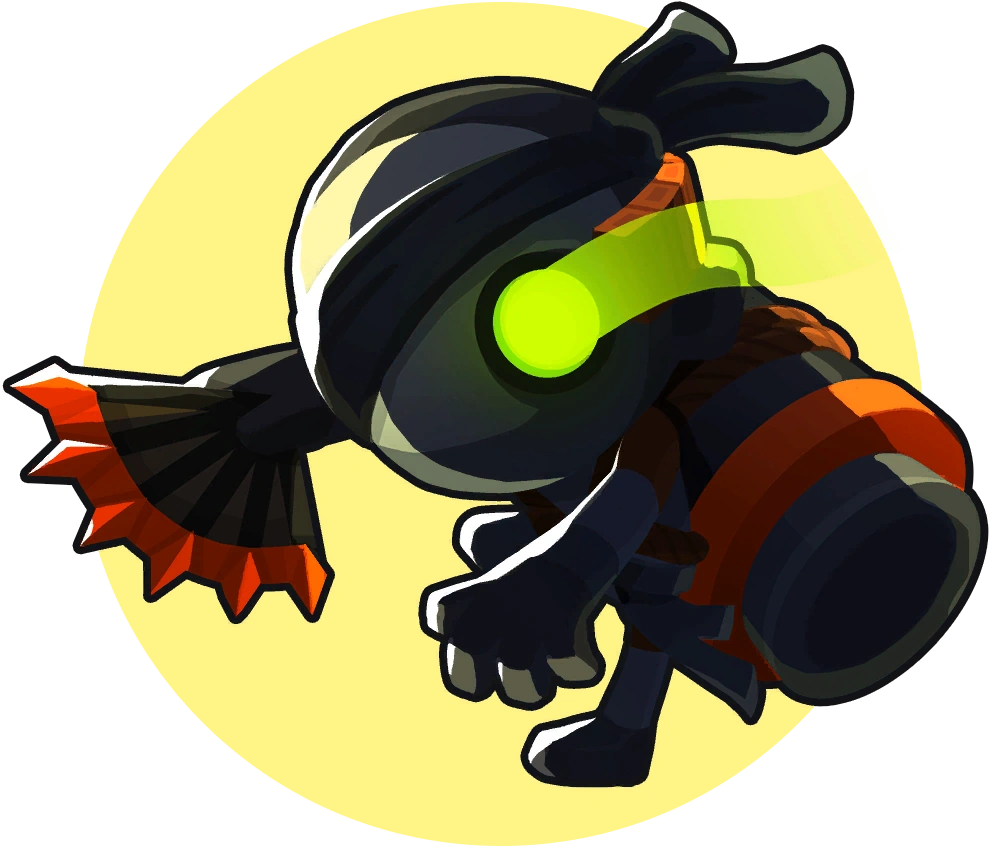
| + | Glaives BTD6 Icon.png|BTD6 upgrade (in upgrade menu) |
||
| + | BTD1 CA.png|BTD1/BTD2 upgrade (Can't Afford) |
||
| + | BTD3 CA.png|BTD3 upgrade (Can't Afford) |
||
| + | BTD4 CA.png|BTD4 upgrade (Can't Afford) |
||
| + | BTD5 CA.png|BTD5 upgrade (Can't Afford) |
||
| + | BTD1 Longer Range Bombs upgrade button.PNG|BTD1/BTD2 upgrade (Bought) |
||
| + | BTD3 AB.png|BTD3 upgrade (Bought) |
||
| + | BTD4 AB.png|BTD4 upgrade (Bought) |
||
| + | BTD5 AB.png|BTD5 upgrade (Bought) |
||
| + | BTD5 MU.png|BTD5 maximum upgrades message |
||
| + | BTD5 UL.png|BTD5 upgrade locked message (Deflation/Daily Challenges) |
||
| + | BTD5 XU.png|BTD5 upgrade requiring XP to unlock |
||
| + | BTD5 UR.png|BTD5 unlock at rank ## message |
||
| + | BTD5 PC.png|BTD5 path closed message |
||
| + | BTD5 UU.png|BTD5 unupgraded message |
||
| + | BTD4 UU.png|BTD4 unupgraded message |
||
| + | </gallery> |
||
==Upgrades== |
==Upgrades== |
||
===[[Bloons Tower Defense 3]]=== |
===[[Bloons Tower Defense 3]]=== |
||
====[[Dart Monkey]]==== |
====[[Dart Monkey]]==== |
||
| − | Description: A monkey that shoots a single dart to pop a single bloon. |
||
| − | |||
| − | Prices: |
||
| − | *Easy:170#REDIRECT [[google.com]] |
||
| − | *Medium:200 |
||
| − | *Hard:215 |
||
Upgrades: |
Upgrades: |
||
| + | *[[Long Range Darts]]: Increases the range of your Dart Monkey. Costs $75 on Easy, $90 on Medium and $95 on Hard. |
||
| − | *Piercing dart: Pops 2 bloons instead of 1. |
||
| + | *[[Extra Long Range Darts]]: Gives the monkey even more throwing distance. Costs $75 on Easy, $90 on Medium and $95 on Hard. |
||
| − | *Long range darts: Increases range of monkey. |
||
| + | *[[Long Range Darts|Piercing Darts]]: Pops 3 bloons instead of 2. Costs $120 on Easy, $145 on Medium and $150 on Hard. |
||
| − | *Spike-o-pult: Turns into a spike-o-pult. Increases range and shoots a spike that goes across the screen, popping bloons. |
||
| + | *[[Long Range Darts|Razor Darts]]: Pops 3 bloons instead of 2. Costs $100 on Easy, $120 on Medium and $130 on Hard. |
||
| − | *Triple shot: Fires three spiked balls at once! |
||
====[[Tack Shooter]]==== |
====[[Tack Shooter]]==== |
||
| − | Description: Shoots a volley of 8 tacks with short range. |
||
| − | *Easy: 300 |
||
| − | *Medium:350 |
||
| − | *Hard:400 |
||
Upgrades: |
Upgrades: |
||
| + | *[[Faster Shooting]]: Makes tack shoot faster. Costs $170 on Easy, $205 on Medium and $215 on Hard. |
||
| − | *Faster shooting: Shoots faster. |
||
| ⚫ | |||
| − | *Extra range: Increases range. |
||
| + | *[[Long Range Tacks|Extra Range]]: Covers a larger area than normal. Costs $85 on Easy, $100 on Medium and $110 on Hard. |
||
| ⚫ | |||
| + | *[[Even Longer Range|Super Range]]: Covers a huge area! Costs $85 on Easy, $100 on Medium and $110 on Hard. |
||
| − | *Ring of fire: Increases range and shoots a wave of fire that pops everything. |
||
====[[Boomerang Thrower]]==== |
====[[Boomerang Thrower]]==== |
||
| − | Description: Shoots a boomerang in a curve pattern. |
||
| − | Prices: |
||
| − | *Easy:340 |
||
| − | *Medium:400 |
||
| − | *Hard:430 |
||
Upgrades: |
Upgrades: |
||
| − | *Multi |
+ | *[[Multi-Target|Multi Target]]: Boomerang will hit up to 5 bloons at once. Costs $230 on Easy, $275 on Medium and $290 on Hard. |
| + | *[[Glaive Thrower]]: Glaives slice through up to 8 bloons at once! Costs $240 on Easy, $285 on Medium and $300 on Hard. |
||
| − | *Sonic boom: Boomerang will be able to pop frozen bloons. |
||
| + | *[[Sonic Boom]]: Sonic boomerangs smash through frozen bloons. Costs $130 on Easy, $155 on Medium and $160 on Hard. |
||
| − | *Glaive thrower: Boomerang will hit up to 12 bloons. |
||
| + | *[[Thermite]]: Thermite can melt through lead bloons. Costs $100 on Easy, $120 on Medium and $130 on Hard. |
||
| ⚫ | |||
| − | ====[[ |
+ | ====[[Spike-o-pult]]==== |
| − | Description: Slow firing bomb that pops many bloons at once. |
||
| − | Prices: |
||
| − | *Easy:595 |
||
| − | *Medium:700 |
||
| − | *Hard:755 |
||
Upgrades: |
Upgrades: |
||
| + | *[[Longer Range (Spike-O-Pult)|Longer Range]]: Increases maximum range of Spike-o-pult. Costs $215 on Easy, $250 on Medium and $270 on Hard. |
||
| − | *Bigger bombs: Shoots bigger bombs. |
||
| + | *[[Juggernaut]]: Spike-o-pult balls roll much further. Costs $700 on Easy, $840 on Medium and $890 on Hard. |
||
| − | *Longer range: Increases range. |
||
| + | *[[Faster Reload (Spike-o-pult)|Faster Reload]]: Can shoot faster than normal. Costs $215 on Easy, $255 on Medium and $270 on Hard. |
||
| − | *Missile launcher: Increases range and fires missiles instead of bombs, missiles fly faster and further. |
||
| + | *[[Multi Shot]]: Shoots three spikey balls at once! Costs $490 on Easy, $585 on Medium and $620 on Hard. |
||
| − | *MOAB mauler: Causes 10x more damage to MOAB's and BFB's |
||
| − | ====[[ |
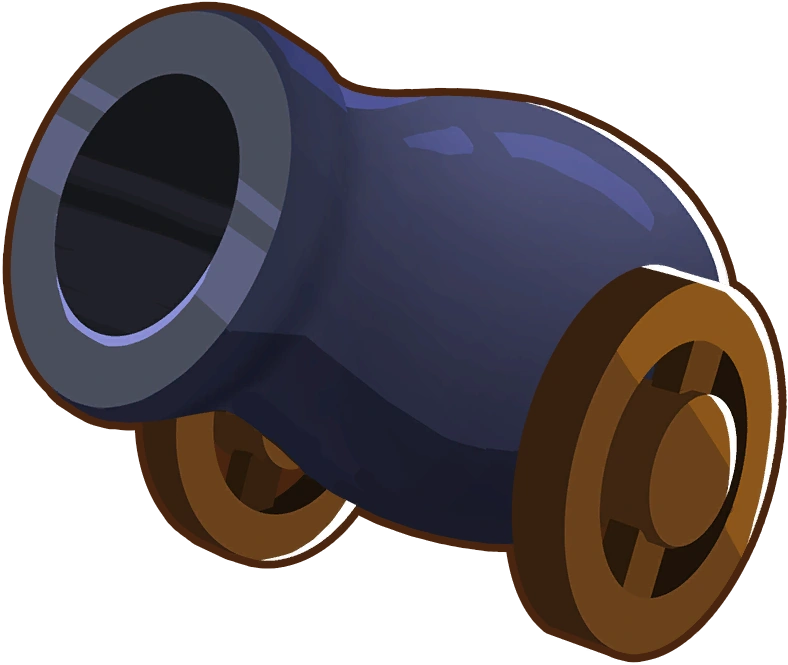
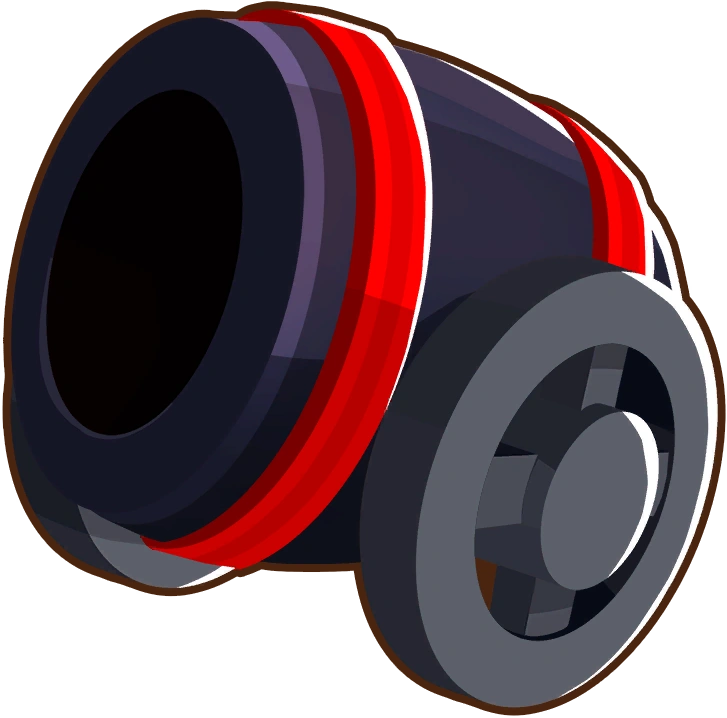
+ | ====[[Cannon]]==== |
| − | Description: Freezes bloons but has short range. Frozen bloons are immune to anything sharp. |
||
| − | Prices: |
||
| − | *Easy:325 |
||
| − | *Medium:380 |
||
| − | *Hard:410 |
||
Upgrades: |
Upgrades: |
||
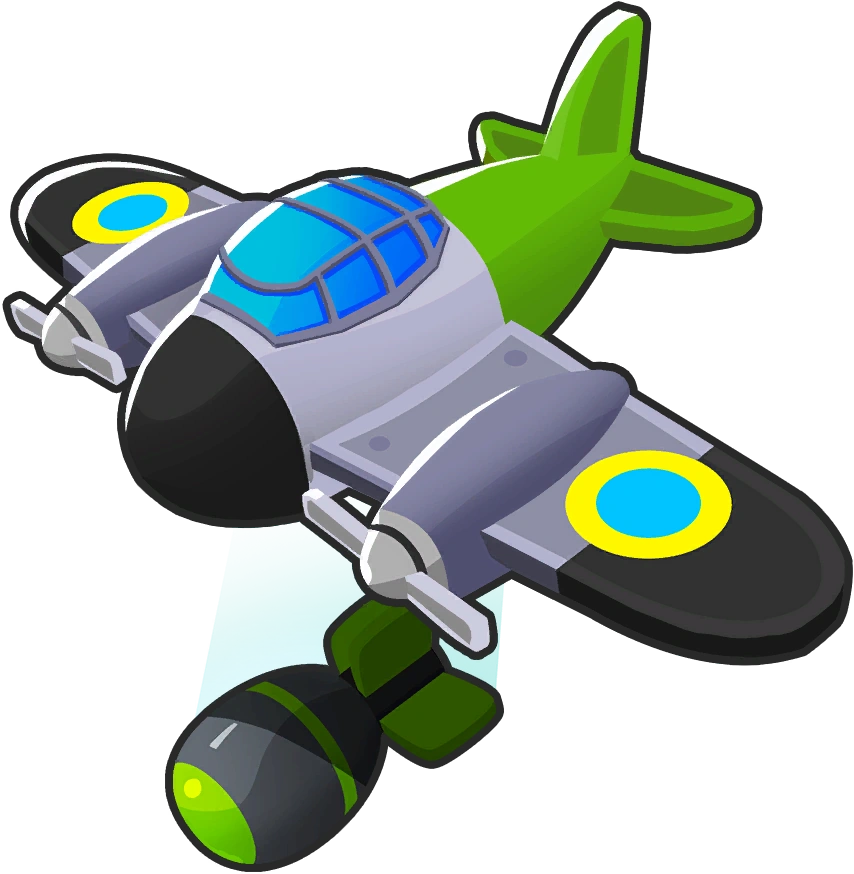
| + | *[[Bigger Bombs]]: Big bombs affect a larger area. $365 on Easy, $440 on Medium and $465 on Hard. |
||
| − | *Improved ice tower: Increases range and freeze time. |
||
| + | *[[Frag Bombs]]: Fragments fly out and pop even more bloons! $185 on Easy, $225 on Medium and $240 on Hard. |
||
| ⚫ | |||
| + | *[[Longer Range (Bomb Tower)|Extra Range Bombs]]: Can shoot bombs further than normal. $170 on Easy, $205 on Medium and $215 on Hard. |
||
| − | *Snap freeze: Pops 1 layer of bloons and then freezes. |
||
| + | *[[Missile Launcher]]: Missiles fly super fast. Costs $180 on Easy, $215 on Medium and $225 on Hard. |
||
| − | *Arctic wind: Increases range and bloons slow down by 66% within its radius. |
||
| − | ====[[ |
+ | ====[[Ice Ball]]==== |
| ⚫ | |||
| − | Description: Aims at a single spot anywhere on the map. |
||
| + | *[[Longer Freeze]]: Bloons stay frozen for longer. Costs $215 on Easy, $255 on Medium and $270 on Hard. |
||
| − | Prices: |
||
| ⚫ | |||
| − | *Easy:700 |
||
| + | *[[Wider Freeze Radius]]: Pops 1 layer of bloons and then freezes. Costs $170 on Easy, $205 on Medium and $215 on Hard. |
||
| − | *Medium:825 |
||
| + | *[[Snap Freeze]]: Freezes so violently that some bloons will pop before freezing! Costs $245 on Easy, $295 on Medium and $315 on Hard. |
||
| − | *Hard:890 |
||
| + | |||
| ⚫ | |||
| + | Upgrades: |
||
| + | *[[Stronger Signal]]: Gives monkey beacon a wider area of effect. Costs $425 on Easy, $510 on Medium and $540 on Hard. |
||
| ⚫ | |||
| + | *[[Monkey Storm Beacon]]: Can call Super Monkey Storms! Costs $2125 on Easy, $2550 on Medium and $1700 on Hard. |
||
| + | |||
| + | ====[[Super Monkey]]==== |
||
| + | Upgrades: |
||
| + | *[[Laser Vision]]: Laser can pop 2 bloons at once, and pop frozen bloons. Costs $2975 on Easy, $3570 on Medium and $3780 on Hard. |
||
| + | *[[Plasma Vision]]: Plasma vaporizes everything it touches! Costs $3400 on Easy, $4080 on Medium and $4320 on Hard. |
||
| + | *[[Super Range]]: Super Range can cover nearly half the screen. Costs $850 on Easy, $1020 on Medium and $1080 on Hard. |
||
| + | *[[Epic Range]]: Epic range allows almost whole map coverage! Costs $1190 on Easy, $1430 on Medium and $1510 on Hard. |
||
| + | |||
| + | ===[[Bloons Tower Defense 4]] === |
||
| + | (note: this section is unfinished) |
||
| + | ====[[Dart Monkey]]==== |
||
| + | Upgrades: |
||
| + | *'''[[Piercing Darts]]: '''Cost: $140 Darts can pop two Bloons instead of one. |
||
| + | *'''[[Long Range Darts]]''' Cost: $90 Gives the monkey more throwing distance. |
||
| + | *'''[[Spike-O-Pult]]''' Cost: $300 Gives the monkey a catapult that hurls giant spiked balls. |
||
| + | *'''[[Triple Shot]]''' Cost: $1,000 Spike-O-Pult becomes three times as deadly. |
||
| + | ====[[Tack Shooter]]==== |
||
| + | Upgrades |
||
| + | *'''[[Faster Shooting]]''' Cost: $210 Increases the fire rate of the Tack Shooter. |
||
| + | *'''[[Extra Range]]''' Cost: $100 Increases the attack radius of the Tack Shooter. |
||
| + | *'''[[Blade Shooter]]''' Cost: $280 Shoots razor sharp bladed discs instead of tacks! |
||
| + | *'''[[Ring of Fire]]''' Cost: $2,500 Throws out a fiery hot burst of flame that can pop anything. |
||
| + | ====[[Boomerang Thrower]]==== |
||
| + | Upgrades |
||
| + | *'''[[Multi Target]]''' Cost: $250 Boomerang will hit up to seven Bloons at once. |
||
| + | *'''[[Sonic Boom]]''' Cost: $100 Sonic boomerangs smash through frozen Bloons. |
||
| + | *'''[[Glaive Thrower]]''' Cost: $280 Glaives slice through up to twelve Bloons at once! |
||
| ⚫ | |||
| + | [[Mortar Tower]] |
||
Upgrades: |
Upgrades: |
||
*Greater accuracy: Increases accuracy of mortars. |
*Greater accuracy: Increases accuracy of mortars. |
||
| Line 77: | Line 107: | ||
====[[Glue Gunner]]==== |
====[[Glue Gunner]]==== |
||
| − | Description: Shoots glue that slows down bloons. |
||
| − | Prices: |
||
| − | *Easy:255 |
||
| − | *Medium:300 |
||
| − | *Hard:325 |
||
Upgrades: |
Upgrades: |
||
*Stickier glue: Glue lasts longer |
*Stickier glue: Glue lasts longer |
||
| Line 87: | Line 112: | ||
*Corrosive glue: Pops bloons every 2 seconds. |
*Corrosive glue: Pops bloons every 2 seconds. |
||
*Glue splatter: Glue splashes affecting up to 20 bloons. |
*Glue splatter: Glue splashes affecting up to 20 bloons. |
||
| − | |||
| ⚫ | |||
| − | Description: Does not attack and provides boosts to the towers within its range. |
||
| − | Prices: |
||
| − | *Easy:850 |
||
| − | *Medium:1000 |
||
| − | *Hard:1080 |
||
| ⚫ | |||
| − | *Wider influence: Increases range. |
||
| ⚫ | |||
| − | *Sonar beacon: Allows towers within its range to shoot camo bloons. |
||
| − | *Monkey storm: Gives the beacon a special attack that wipes out the whole screen, has a price and a cool down time. Unique. |
||
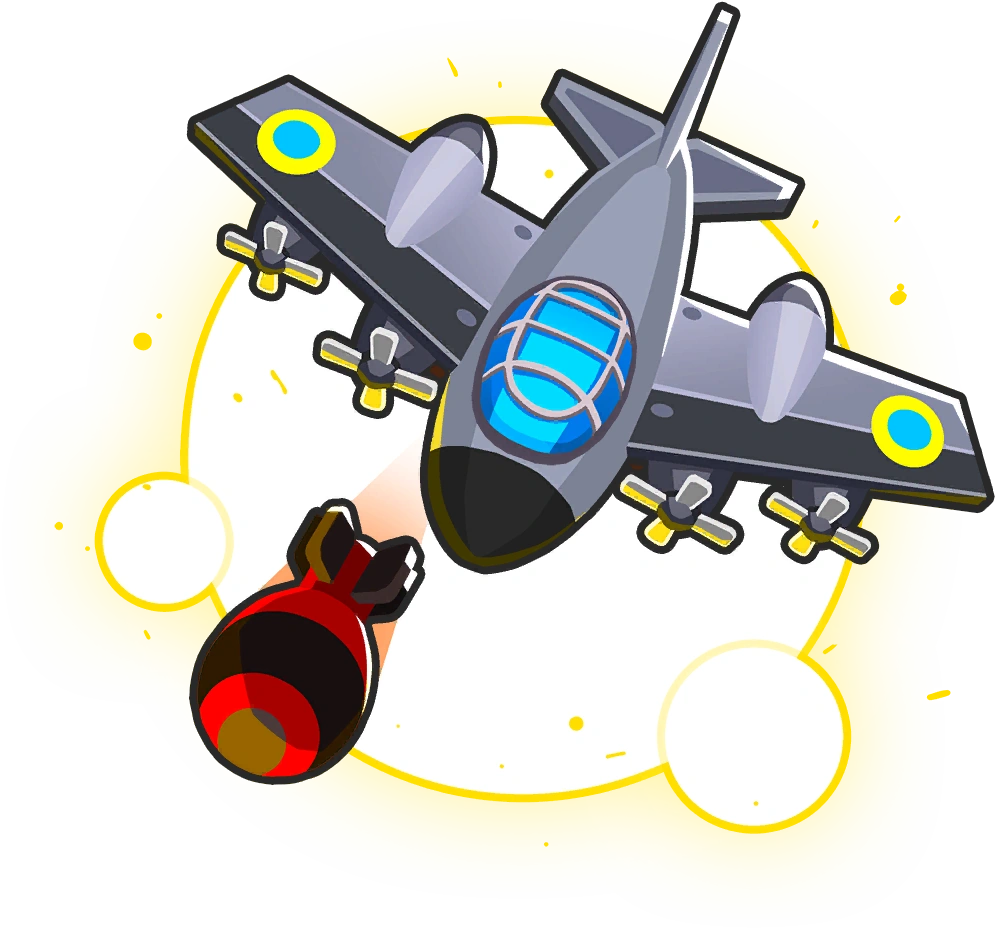
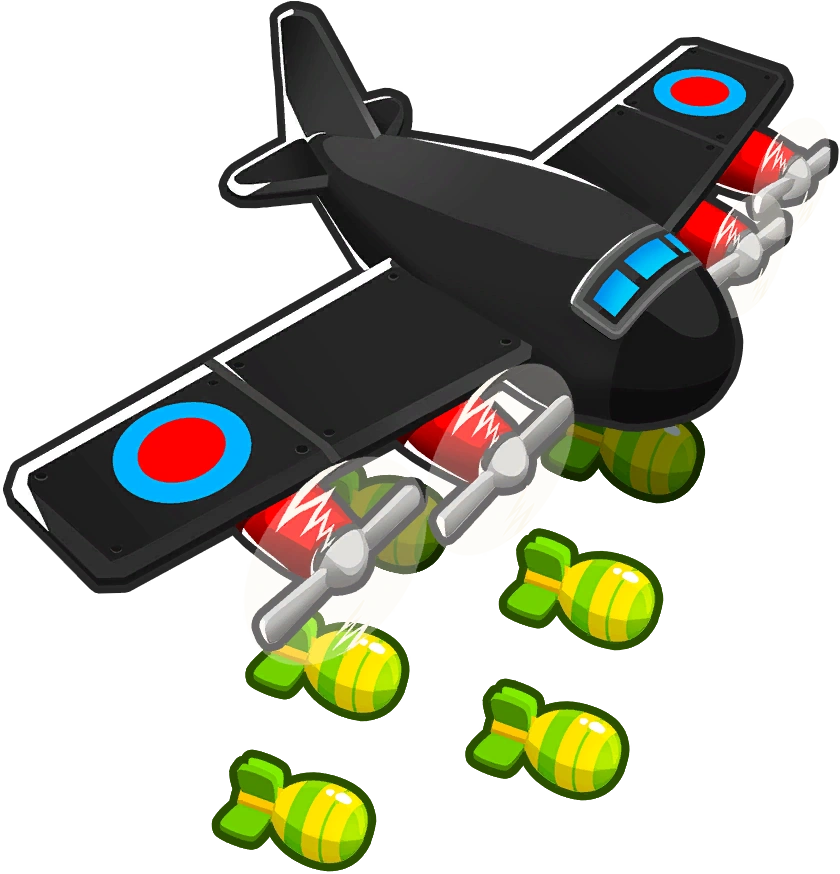
====[[Monkey Ace]]==== |
====[[Monkey Ace]]==== |
||
| − | Description: Flies above towers and the map in a figure 8 pattern, shoots a volley of 8 darts. |
||
| − | Prices: |
||
| − | *Easy:765 |
||
| − | *Medium:900 |
||
| − | *Hard:970 |
||
Upgrades: |
Upgrades: |
||
*Pineapple express: Sometimes drops explosive pineapples on the map. |
*Pineapple express: Sometimes drops explosive pineapples on the map. |
||
| Line 113: | Line 121: | ||
====[[Monkey Buccaneer]]==== |
====[[Monkey Buccaneer]]==== |
||
| − | Description: Can only be placed on water. Has a long range and shoots a single heavy dart. |
||
| − | Prices: |
||
| − | *Easy:510 |
||
| − | *Medium:600 |
||
| − | *Hard:650 |
||
Upgrades: |
Upgrades: |
||
*Grape shot: Adds a small volley of grapes to the shot. |
*Grape shot: Adds a small volley of grapes to the shot. |
||
| Line 125: | Line 128: | ||
====[[Monkey Apprentice]]==== |
====[[Monkey Apprentice]]==== |
||
| − | Description: Very flexible. Uses its old and new magic. |
||
| − | Prices: |
||
| − | *Easy:470 |
||
| − | *Medium:550 |
||
| − | *Hard:595 |
||
Upgrades: |
Upgrades: |
||
*Intense magic: Pops 7 bloons instead of 2. |
*Intense magic: Pops 7 bloons instead of 2. |
||
| Line 137: | Line 135: | ||
====[[Super Monkey]]==== |
====[[Super Monkey]]==== |
||
| − | Description: Shoots super fast and has a big range. |
||
| − | Prices: |
||
| − | *Easy:3400 |
||
| − | *Medium:4000 |
||
| − | *Hard:4320 |
||
Upgrades: |
Upgrades: |
||
*Super range: Greatly increase range. |
*Super range: Greatly increase range. |
||
| Line 149: | Line 142: | ||
====[[Banana Farm]]==== |
====[[Banana Farm]]==== |
||
| − | Description: Does not attack. Gives extra $80 at the end of each round. Very helpful. |
||
| − | Prices: |
||
| − | *Easy:850 |
||
| − | *Medium:1000 |
||
| − | *Hard:1080 |
||
Upgrades: |
Upgrades: |
||
*More bananas: Gives 120 money per round. |
*More bananas: Gives 120 money per round. |
||
| Line 162: | Line 150: | ||
====[[Dartling Gun]]==== |
====[[Dartling Gun]]==== |
||
| − | Description: Shoots darts rapidly, but a little inaccurately to wherever your mouse is. You can decide exactly where this tower will shoot by moving your mouse wherever you want! |
||
| − | |||
| − | Prices: |
||
| − | *Easy:1065 |
||
| − | *Medium:1250 |
||
| − | *Hard:1380 |
||
Upgrades: |
Upgrades: |
||
*Steady Firing: Lowers the firing spread. |
*Steady Firing: Lowers the firing spread. |
||
| Line 175: | Line 157: | ||
====[[Spike Factory]]==== |
====[[Spike Factory]]==== |
||
| + | Upgrades: |
||
| − | Bigger Stacks: More |
+ | *Bigger Stacks: More stacks= win |
| − | White Hot Spikes: Now, tacks could pop lead bloons |
+ | *White Hot Spikes: Now, tacks could pop lead bloons |
| − | Faster Production: Produces tacks faster |
+ | *Faster Production: Produces tacks faster |
| − | Spike Storm: Every 20 seconds, the factory generates a storm of short-lived tacks filling up the entire track. |
+ | *Spike Storm: Every 20 seconds, the factory generates a storm of short-lived tacks filling up the entire track. |
===[[Bloons Tower Defense 5]]=== |
===[[Bloons Tower Defense 5]]=== |
||
====[[Dart Monkey]]==== |
====[[Dart Monkey]]==== |
||
| + | Upgrades: |
||
| − | Shoot a single dart that pops a single bloon. A good, cheap tower suitable for the early rounds. |
||
====Path 1==== |
====Path 1==== |
||
| − | Long Range Darts: Increase range. |
+ | *Long Range Darts: Increase range. |
| − | Enhanced Eyesight: Further increase range and can detect camo. |
+ | *Enhanced Eyesight: Further increase range and can detect camo. |
| − | Spike-O-Pult: Become a spike-o-pult, shoots spiked ball which can pop up to 18 bloons and increase range but decrease attack speed. |
+ | *Spike-O-Pult: Become a spike-o-pult, shoots spiked ball which can pop up to 18 bloons and increase range but decrease attack speed. |
| − | Juggernaut: Spiked ball become bigger, and able pop up to 100 bloons, included frozen and lead, and 5 damage to ceramics. |
+ | *Juggernaut: Spiked ball become bigger, and able pop up to 100 bloons, included frozen and lead, and 5 damage to ceramics. |
====Path 2==== |
====Path 2==== |
||
| − | Sharp Shots: Extra 1 pierce. |
+ | *Sharp Shots: Extra 1 pierce. |
| − | Razor Sharp Shots: Extra 2 pierces. |
+ | *Razor Sharp Shots: Extra 2 pierces. |
| − | Triple Darts: Now throw 3 darts. |
+ | *Triple Darts: Now throw 3 darts. |
| − | Super Monkey Fan Club: Ability: Converts upt o 10 nearby dart monkeys into Super Monkeys for 15s. |
+ | *Super Monkey Fan Club: Ability: Converts upt o 10 nearby dart monkeys into Super Monkeys for 15s. |
====[[Tack Shooter]]==== |
====[[Tack Shooter]]==== |
||
| + | Upgrades: |
||
====Path 1==== |
====Path 1==== |
||
| − | Faster Shooting: Shoot faster. |
+ | *Faster Shooting: Shoot faster. |
| − | Even Faster Shooting: Shoot even faster. |
+ | *Even Faster Shooting: Shoot even faster. |
| − | Tack Sprayer: Shoot 16 tacks now. |
+ | *Tack Sprayer: Shoot 16 tacks now. |
| − | Ring of Fire: Shoots out a ring that pops 60 bloons, included frozen and lead bloons. Also increase range. |
+ | *Ring of Fire: Shoots out a ring that pops 60 bloons, included frozen and lead bloons. Also increase range. |
====Path 2==== |
====Path 2==== |
||
| − | Extra Range Tacks: Increase range. |
+ | *Extra Range Tacks: Increase range. |
| + | |||
| ⚫ | |||
| + | |||
| ⚫ | |||
| ⚫ | |||
| ⚫ | |||
| + | ===[[Bloons Tower Defense 5 Mobile]]=== |
||
| ⚫ | |||
| + | {{Main|Tower and upgrade stats (BTD5M, BMCM and Battles Mobile)}} |
||
| ⚫ | |||
===[[Bloons Tower Defense 6]]=== |
===[[Bloons Tower Defense 6]]=== |
||
Below are a list of upgrades in BTD6. Hover over the image to read the official description of the selected upgrade. Click on the hyperlink of the selected upgrade name to read more information of that particular upgrade. |
Below are a list of upgrades in BTD6. Hover over the image to read the official description of the selected upgrade. Click on the hyperlink of the selected upgrade name to read more information of that particular upgrade. |
||
| − | '''Note:''' Upgrades prices are valid as of Version |
+ | '''Note:''' Upgrades prices are valid as of Version 16.2. Most of the descriptions (some of which are incompleted) are valid as of Version 16.2. Prices are shown in Medium Difficulty. |
====Primary Monkeys==== |
====Primary Monkeys==== |
||
{| class="article-table" border="0" cellpadding="1" cellspacing="1" style="width: 900px;" |
{| class="article-table" border="0" cellpadding="1" cellspacing="1" style="width: 900px;" |
||
| Line 240: | Line 228: | ||
|- |
|- |
||
| rowspan="3" |[[file:000-DartMonkey.png|100px|(description text to be added soon)]]<br />[[Dart Monkey]]<br />($200) |
| rowspan="3" |[[file:000-DartMonkey.png|100px|(description text to be added soon)]]<br />[[Dart Monkey]]<br />($200) |
||
| − | |[[file:100-Dartmonkey.png| |
+ | |[[file:100-Dartmonkey.png|x100px|Can pop 1 extra Bloon per shot.]]<br />[[Sharp Shots]]<br />($140) |
| − | |[[file:200-Dartmonkey.png| |
+ | |[[file:200-Dartmonkey.png|x100px|Can pop 2 more Bloons per shot.]]<br />[[Razor Sharp Shots]]<br />($220) |
| − | |[[file:300-Dartmonkey.png| |
+ | |[[file:300-Dartmonkey.png|x100px|Converts the Dart Monkey into a Spike-o-pult that hurls a large spiked ball instead of darts. Good range, but slower attack speed. Each ball can pop lots of Bloons.]]<br />[[Spike-O-Pult]]<br />($300) |
| − | |[[file:400-Dartmonkey.png| |
+ | |[[file:400-Dartmonkey.png|x100px|Hurls a giant spiked ball that pops lead and excels at crushing Ceramic Bloons.]]<br />[[Juggernaut]]<br />($1800) |
| − | |[[file:500-Dartmonkey.png| |
+ | |[[file:500-Dartmonkey.png|x100px|Gigantic spiked ball splits twice into 6 Juggernaut balls for even more destructive power.]]<br />[[Ultra-Juggernaut]]<br />($15,000) |
|- |
|- |
||
| − | |[[file:010-Dartmonkey.png| |
+ | |[[file:010-Dartmonkey.png|x100px|Shoots 15% faster.]]<br />[[Quick Shots]]<br />($100) |
| − | |[[file:020-Dartmonkey.png| |
+ | |[[file:020-Dartmonkey.png|x100px|Shoots 33% faster!]]<br />[[Very Quick Shots]]<br />($190) |
| − | |[[file:030-Dartmonkey.png| |
+ | |[[file:030-Dartmonkey.png|x100px|Throws 3 darts at a time instead of 1.]]<br />[[Triple Shot]]<br />($400) |
| − | |[[file:040-Dartmonkey.png| |
+ | |[[file:040-Dartmonkey.png|x100px|Super Monkey Fan Club ability: Converts up to 10 nearby Dart Monkeys including himself into Super Monkeys for 10 seconds.]]<br />[[Super Monkey Fan Club]]<br />($8000) |
|[[file:050-Dartmonkey.png|100px|Elite membership of this club grants the Dart Monkeys even more power!]]<br />[[Plasma Monkey Fan Club]]<br />($50,000) |
|[[file:050-Dartmonkey.png|100px|Elite membership of this club grants the Dart Monkeys even more power!]]<br />[[Plasma Monkey Fan Club]]<br />($50,000) |
||
|- |
|- |
||
| − | |[[file:001-Dartmonkey.png| |
+ | |[[file:001-Dartmonkey.png|x100px|Makes the Dart Monkey shoot further than normal.]]<br />[[Long Range Darts]]<br />($90) |
| − | |[[file:002-Dartmonkey.png| |
+ | |[[file:002-Dartmonkey.png|x100px|Shoots even further and can detect Camo Bloons.]]<br />[[Enhanced Eyesight]]<br />($200) |
| − | |[[file:003-Dartmonkey.png| |
+ | |[[file:003-Dartmonkey.png|x100px|Uses a long range Crossbow that can pop 3 layers of Bloon for every hit.]]<br />[[Crossbow]]<br />($625) |
| − | |[[file:004-Dartmonkey.png| |
+ | |[[file:004-Dartmonkey.png|x100px|Sharp Shooter does powerful Crit Shots every few seconds that do a lot more damage.]]<br />[[Sharp Shooter]]<br />($2000) |
| − | |[[file:005-Dartmonkey.png| |
+ | |[[file:005-Dartmonkey.png|x100px|Crossbow Master shoots really fast and devastates most Bloon types with ease.]]<br />[[Crossbow Master]]<br />($25,000) |
|- |
|- |
||
| rowspan="3" |[[file:000-BoomerangMonkey.png|100px|(description text to be added soon)]]<br />[[Boomerang Monkey]]<br />($325) |
| rowspan="3" |[[file:000-BoomerangMonkey.png|100px|(description text to be added soon)]]<br />[[Boomerang Monkey]]<br />($325) |
||
| − | |[[file:100-BoomerangMonkey.png| |
+ | |[[file:100-BoomerangMonkey.png|x100px|(description text to be added soon)]]<br />[[Improved Rangs]]<br />($200) |
| − | |[[file:200-BoomerangMonkey.png| |
+ | |[[file:200-BoomerangMonkey.png|x100px|(description text to be added soon)]]<br />[[Glaives]]<br />($280) |
| − | |[[file:300-BoomerangMonkey.png| |
+ | |[[file:300-BoomerangMonkey.png|x100px|(description text to be added soon)]]<br />[[Glaive Ricochet]]<br />($1300) |
| − | |[[file:400-BoomerangMonkey.png| |
+ | |[[file:400-BoomerangMonkey.png|x100px|(description text to be added soon)]]<br />[[M.O.A.R Glaives]]<br />($3000) |
| − | |[[file:500-BoomerangMonkey.png| |
+ | |[[file:500-BoomerangMonkey.png|x100px|(description text to be added soon)]]<br />[[Glaive Lord]]<br />($40,000) |
|- |
|- |
||
| − | |[[file:010-BoomerangMonkey.png| |
+ | |[[file:010-BoomerangMonkey.png|x100px|(description text to be added soon)]]<br />[[Faster Throwing (Boomerang Thrower)|Faster Throwing]]<br />($175) |
| − | |[[file:020-BoomerangMonkey.png| |
+ | |[[file:020-BoomerangMonkey.png|x100px|(description text to be added soon)]]<br />[[Faster Rangs]]<br />($250) |
| − | |[[file:030-BoomerangMonkey.png| |
+ | |[[file:030-BoomerangMonkey.png|x100px|(description text to be added soon)]]<br />[[Bionic Boomerang]]<br />($1600) |
| − | |[[file:040-BoomerangMonkey.png| |
+ | |[[file:040-BoomerangMonkey.png|x100px|(description text to be added soon)]]<br />[[Turbo Charge]]<br />($4000) |
| − | |[[file:050-BoomerangMonkey.png| |
+ | |[[file:050-BoomerangMonkey.png|x100px|(description text to be added soon)]]<br />[[Perma Charge]]<br />($35,000) |
|- |
|- |
||
| − | |[[file:001-BoomerangMonkey.png| |
+ | |[[file:001-BoomerangMonkey.png|x100px|(description text to be added soon)]]<br />[[Long Range Rangs]]<br />($100) |
| − | |[[file:002-BoomerangMonkey.png| |
+ | |[[file:002-BoomerangMonkey.png|x100px|(description text to be added soon)]]<br />[[Red Hot 'Rangs]]<br />($300) |
| − | |[[file:003-BoomerangMonkey.png| |
+ | |[[file:003-BoomerangMonkey.png|x100px|(description text to be added soon)]]<br />[[Kylie Boomerangs]]<br />($1300) |
| − | |[[file:004-BoomerangMonkey.png| |
+ | |[[file:004-BoomerangMonkey.png|x100px|(description text to be added soon)]]<br />[[MOAB Press]]<br />($1800) |
| − | |[[file:005-BoomerangMonkey.png| |
+ | |[[file:005-BoomerangMonkey.png|x100px|(description text to be added soon)]]<br />[[MOAB Domination]]<br />($60,000) |
|- |
|- |
||
| rowspan="3" |[[file:000-BombShooter.png|100px|(description text to be added soon)]]<br />[[Bomb Shooter]]<br />($600) |
| rowspan="3" |[[file:000-BombShooter.png|100px|(description text to be added soon)]]<br />[[Bomb Shooter]]<br />($600) |
||
| Line 292: | Line 280: | ||
|[[file:001-BombShooter.png|100px|(description text to be added soon)]]<br />[[Extra Range]]<br />($200) |
|[[file:001-BombShooter.png|100px|(description text to be added soon)]]<br />[[Extra Range]]<br />($200) |
||
|[[file:002-BombShooter.png|100px|(description text to be added soon)]]<br />[[Frag Bombs]]<br />($300) |
|[[file:002-BombShooter.png|100px|(description text to be added soon)]]<br />[[Frag Bombs]]<br />($300) |
||
| − | |[[file:003-BombShooter.png|100px| |
+ | |[[file:003-BombShooter.png|100px|MOAB Maulers do much more damage to MOAB-Class Bloons and ceramics.]]<br />[[Cluster Bombs]]<br />($800) |
| − | |[[file:004-BombShooter.png|100px|(description text to be added soon)]]<br />[[Recursive Cluster]]<br />($ |
+ | |[[file:004-BombShooter.png|100px|(description text to be added soon)]]<br />[[Recursive Cluster]]<br />($2800) |
|[[file:005-BombShooter.png|100px|(description text to be added soon)]]<br />[[Bomb Blitz]]<br />($35,000) |
|[[file:005-BombShooter.png|100px|(description text to be added soon)]]<br />[[Bomb Blitz]]<br />($35,000) |
||
|- |
|- |
||
| Line 312: | Line 300: | ||
|[[file:002-TackShooter.png|100px|(description text to be added soon)]]<br />[[Even More Tacks]]<br />($100) |
|[[file:002-TackShooter.png|100px|(description text to be added soon)]]<br />[[Even More Tacks]]<br />($100) |
||
|[[file:003-TackShooter.png|100px|(description text to be added soon)]]<br />[[Tack Sprayer]]<br />($450) |
|[[file:003-TackShooter.png|100px|(description text to be added soon)]]<br />[[Tack Sprayer]]<br />($450) |
||
| − | |[[file:004-TackShooter.png|100px|(description text to be added soon)]]<br />[[Overdrive]]<br />($ |
+ | |[[file:004-TackShooter.png|100px|(description text to be added soon)]]<br />[[Overdrive]]<br />($3200) |
| − | |[[file:005-TackShooter.png|100px|(description text to be added soon)]]<br />[[The Tack Zone]]<br />($ |
+ | |[[file:005-TackShooter.png|100px|(description text to be added soon)]]<br />[[The Tack Zone]]<br />($24,000) |
|- |
|- |
||
| rowspan="3" |[[file:000-IceMonkey.png|100px|(description text to be added soon)]]<br />[[Ice Monkey]]<br />$500) |
| rowspan="3" |[[file:000-IceMonkey.png|100px|(description text to be added soon)]]<br />[[Ice Monkey]]<br />$500) |
||
| Line 324: | Line 312: | ||
|[[file:010-IceMonkey.png|100px|(description text to be added soon)]]<br />[[Enhanced Freeze]]<br />($225) |
|[[file:010-IceMonkey.png|100px|(description text to be added soon)]]<br />[[Enhanced Freeze]]<br />($225) |
||
|[[file:020-IceMonkey.png|100px|(description text to be added soon)]]<br />[[Deep Freeze]]<br />($350) |
|[[file:020-IceMonkey.png|100px|(description text to be added soon)]]<br />[[Deep Freeze]]<br />($350) |
||
| − | |[[file:030-IceMonkey.png|100px|(description text to be added soon)]]<br />[[Arctic Wind]]<br />($ |
+ | |[[file:030-IceMonkey.png|100px|(description text to be added soon)]]<br />[[Arctic Wind]]<br />($3200) |
| − | |[[file:040-IceMonkey.png|100px|(description text to be added soon)]]<br />[[Snowstorm]]<br />($ |
+ | |[[file:040-IceMonkey.png|100px|(description text to be added soon)]]<br />[[Snowstorm]]<br />($3000) |
|[[file:050-IceMonkey.png|100px|(description text to be added soon)]]<br />[[Absolute Zero]]<br />($26,000) |
|[[file:050-IceMonkey.png|100px|(description text to be added soon)]]<br />[[Absolute Zero]]<br />($26,000) |
||
|- |
|- |
||
| Line 345: | Line 333: | ||
|[[file:030-GlueGunner.png|100px|(description text to be added soon)]]<br />[[Glue Hose]]<br />($3250) |
|[[file:030-GlueGunner.png|100px|(description text to be added soon)]]<br />[[Glue Hose]]<br />($3250) |
||
|[[file:040-GlueGunner.png|100px|(description text to be added soon)]]<br />[[Glue Strike]]<br />($3500) |
|[[file:040-GlueGunner.png|100px|(description text to be added soon)]]<br />[[Glue Strike]]<br />($3500) |
||
| − | |[[file:050-GlueGunner.png|100px| |
+ | |[[file:050-GlueGunner.png|100px|Glue Storm ability pelts the whole screen over 15 seconds with glue. Glued Bloons take extra damage while glued.]]<br />[[Glue Storm]]<br />($15,000) |
|- |
|- |
||
|[[file:001-GlueGunner.png|100px|(description text to be added soon)]]<br />[[Stickier Glue]]<br />($120) |
|[[file:001-GlueGunner.png|100px|(description text to be added soon)]]<br />[[Stickier Glue]]<br />($120) |
||
| Line 366: | Line 354: | ||
|[[file:100-SniperMonkey.png|100px|(description text to be added soon)]]<br />[[Full Metal Jacket]]<br />($350) |
|[[file:100-SniperMonkey.png|100px|(description text to be added soon)]]<br />[[Full Metal Jacket]]<br />($350) |
||
|[[file:200-SniperMonkey.png|100px|(description text to be added soon)]]<br />[[Large Calibre]]<br />($1500) |
|[[file:200-SniperMonkey.png|100px|(description text to be added soon)]]<br />[[Large Calibre]]<br />($1500) |
||
| − | |[[file:300-SniperMonkey.png|100px| |
+ | |[[file:300-SniperMonkey.png|100px|20 damage per shot, plus bonus damage to Ceramics.]]<br />[[Deadly Precision]]<br />($3000) |
| − | |[[file:400-SniperMonkey.png|100px|(description text to be added soon)]]<br />[[Maim MOAB]]<br />($ |
+ | |[[file:400-SniperMonkey.png|100px|(description text to be added soon)]]<br />[[Maim MOAB]]<br />($5000) |
|[[file:500-SniperMonkey.png|100px|(description text to be added soon)]]<br />[[Cripple MOAB]]<br />($40,000) |
|[[file:500-SniperMonkey.png|100px|(description text to be added soon)]]<br />[[Cripple MOAB]]<br />($40,000) |
||
|- |
|- |
||
| Line 387: | Line 375: | ||
|[[file:300-MonkeySub.png|100px|(description text to be added soon)]]<br />[[Submerge and Support]]<br />($500) |
|[[file:300-MonkeySub.png|100px|(description text to be added soon)]]<br />[[Submerge and Support]]<br />($500) |
||
|[[file:400-MonkeySub.png|100px|(description text to be added soon)]]<br />[[Bloontonium Reactor]]<br />($2500) |
|[[file:400-MonkeySub.png|100px|(description text to be added soon)]]<br />[[Bloontonium Reactor]]<br />($2500) |
||
| − | |[[file:500-MonkeySub.png|100px|(description text to be added soon)]]<br />[[Energizer]]<br />($ |
+ | |[[file:500-MonkeySub.png|100px|(description text to be added soon)]]<br />[[Energizer]]<br />($32,000) |
|- |
|- |
||
|[[file:010-MonkeySub.png|100px|(description text to be added soon)]]<br />[[Barbed Darts]]<br />($450) |
|[[file:010-MonkeySub.png|100px|(description text to be added soon)]]<br />[[Barbed Darts]]<br />($450) |
||
| Line 393: | Line 381: | ||
|[[file:030-MonkeySub.png|100px|(description text to be added soon)]]<br />[[Ballistic Missile]]<br />($1500) |
|[[file:030-MonkeySub.png|100px|(description text to be added soon)]]<br />[[Ballistic Missile]]<br />($1500) |
||
|[[file:040-MonkeySub.png|100px|(description text to be added soon)]]<br />[[First Strike Capability]]<br />($13,000) |
|[[file:040-MonkeySub.png|100px|(description text to be added soon)]]<br />[[First Strike Capability]]<br />($13,000) |
||
| − | |[[file:050-MonkeySub.png|100px|(description text to be added soon)]]<br />[[Pre-Emptive Strike]]<br />($ |
+ | |[[file:050-MonkeySub.png|100px|(description text to be added soon)]]<br />[[Pre-Emptive Strike]]<br />($32,000) |
|- |
|- |
||
|[[file:001-MonkeySub.png|100px|(description text to be added soon)]]<br />[[Twin Guns]]<br />($450) |
|[[file:001-MonkeySub.png|100px|(description text to be added soon)]]<br />[[Twin Guns]]<br />($450) |
||
| Line 405: | Line 393: | ||
|[[file:200-MonkeyBuccaneer.png|100px|(description text to be added soon)]]<br />[[Double Shot (Monkey Buccaneer)|Double Shot]]<br />($500) |
|[[file:200-MonkeyBuccaneer.png|100px|(description text to be added soon)]]<br />[[Double Shot (Monkey Buccaneer)|Double Shot]]<br />($500) |
||
|[[file:300-MonkeyBuccaneer.png|100px|(description text to be added soon)]]<br />[[Destroyer]]<br />($2950) |
|[[file:300-MonkeyBuccaneer.png|100px|(description text to be added soon)]]<br />[[Destroyer]]<br />($2950) |
||
| − | |[[file:400-MonkeyBuccaneer.png|100px|(description text to be added soon)]]<br />[[Aircraft Carrier]]<br />($ |
+ | |[[file:400-MonkeyBuccaneer.png|100px|(description text to be added soon)]]<br />[[Aircraft Carrier]]<br />($7500) |
|[[file:500-MonkeyBuccaneer.png|100px|(description text to be added soon)]]<br />[[Carrier Flagship]]<br />($25,000) |
|[[file:500-MonkeyBuccaneer.png|100px|(description text to be added soon)]]<br />[[Carrier Flagship]]<br />($25,000) |
||
|- |
|- |
||
| Line 417: | Line 405: | ||
|[[file:002-MonkeyBuccaneer.png|100px|(description text to be added soon)]]<br />[[Crow's Nest]]<br />($400) |
|[[file:002-MonkeyBuccaneer.png|100px|(description text to be added soon)]]<br />[[Crow's Nest]]<br />($400) |
||
|[[file:003-MonkeyBuccaneer.png|100px|(description text to be added soon)]]<br />[[Merchantmen]]<br />($2300) |
|[[file:003-MonkeyBuccaneer.png|100px|(description text to be added soon)]]<br />[[Merchantmen]]<br />($2300) |
||
| − | |[[file:004-MonkeyBuccaneer.png|100px| |
+ | |[[file:004-MonkeyBuccaneer.png|100px|Generates lots of money per round, and Monkeys sold in radius get more cash back, and increased attack speed.]]<br />[[Favored Trades]]<br />($5500) |
| − | |[[file:005-MonkeyBuccaneer.png|100px| |
+ | |[[file:005-MonkeyBuccaneer.png|100px|Generates more cash per round. Increases cash earned by up to 20 other Merchantmen by the number of Merchantmen, and boosts all Merchantmen damage.]]<br />[[Trade Empire]]<br />($23,000) |
|- |
|- |
||
| rowspan="3" |[[file:000-MonkeyAce.png|100px|(description text to be added soon)]]<br />[[Monkey Ace]]<br />($800) |
| rowspan="3" |[[file:000-MonkeyAce.png|100px|(description text to be added soon)]]<br />[[Monkey Ace]]<br />($800) |
||
| Line 465: | Line 453: | ||
|[[file:500-MortarMonkey.png|100px|(description text to be added soon)]]<br />[[The Biggest One]]<br />($28,000) |
|[[file:500-MortarMonkey.png|100px|(description text to be added soon)]]<br />[[The Biggest One]]<br />($28,000) |
||
|- |
|- |
||
| − | |[[file:010-MortarMonkey.png|100px| |
+ | |[[file:010-MortarMonkey.png|100px|Increases the attack speed of the Mortar.]]<br />[[Faster Reload (Mortar Monkey)|Faster Reload]]<br />($300) |
| − | |[[file:020-MortarMonkey.png|100px| |
+ | |[[file:020-MortarMonkey.png|100px|Even faster reload.]]<br />[[Rapid Reload]]<br />($500) |
| − | |[[file:030-MortarMonkey.png|100px| |
+ | |[[file:030-MortarMonkey.png|100px|Heavy shells do extra damage to Ceramic, Lead, and all Fortified Bloons. Can also pop Black Bloons.]]<br />[[Heavy Shells]]<br />($900) |
| − | |[[file:040-MortarMonkey.png|100px| |
+ | |[[file:040-MortarMonkey.png|100px|Artillery battery has 3 barrels for triple the pain.]]<br />[[Artillery Battery]]<br />($5500) |
| − | |[[file:050-MortarMonkey.png|100px| |
+ | |[[file:050-MortarMonkey.png|100px|Pop and Awe ability: Rains explosions over the whole screen, popping and immobilizing all Bloons for a few seconds.]]<br />[[Pop and Awe]]<br />($30,000) |
|- |
|- |
||
|[[file:001-MortarMonkey.png|100px|(description text to be added soon)]]<br />[[Increased Accuracy]]<br />($200) |
|[[file:001-MortarMonkey.png|100px|(description text to be added soon)]]<br />[[Increased Accuracy]]<br />($200) |
||
| Line 475: | Line 463: | ||
|[[file:003-MortarMonkey.png|100px|(description text to be added soon)]]<br />[[Signal Flare]]<br />($700) |
|[[file:003-MortarMonkey.png|100px|(description text to be added soon)]]<br />[[Signal Flare]]<br />($700) |
||
|[[file:004-MortarMonkey.png|100px|(description text to be added soon)]]<br />[[Shattering Shells]]<br />($11,000) |
|[[file:004-MortarMonkey.png|100px|(description text to be added soon)]]<br />[[Shattering Shells]]<br />($11,000) |
||
| − | |[[file:005-MortarMonkey.png|100px| |
+ | |[[file:005-MortarMonkey.png|100px|Superhot burny stuff melts through 5 layers of bloon each shot, burns MOAB class bloons for extra damage, and strips DDT camo.]]<br />[[Blooncineration]]<br />($45,000) |
|} |
|} |
||
| Line 534: | Line 522: | ||
|[[file:010-NinjaMonkey.png|100px|(description text to be added soon)]]<br />[[Distraction]]<br />($350) |
|[[file:010-NinjaMonkey.png|100px|(description text to be added soon)]]<br />[[Distraction]]<br />($350) |
||
|[[file:020-NinjaMonkey.png|100px|(description text to be added soon)]]<br />[[Counter-Espionage]]<br />($500) |
|[[file:020-NinjaMonkey.png|100px|(description text to be added soon)]]<br />[[Counter-Espionage]]<br />($500) |
||
| − | |[[file:030-NinjaMonkey.png|100px| |
+ | |[[file:030-NinjaMonkey.png|100px|Increases attack speed and pierce of nearby Ninjas. Stacks 20 times.]]<br />[[Shinobi Tactics]]<br />($900) |
|[[file:040-NinjaMonkey.png|100px|(description text to be added soon)]]<br />[[Bloon Sabotage]]<br />($5000) |
|[[file:040-NinjaMonkey.png|100px|(description text to be added soon)]]<br />[[Bloon Sabotage]]<br />($5000) |
||
|[[file:050-NinjaMonkey.png|100px|(description text to be added soon)]]<br />[[Grand Saboteur]]<br />($22,000) |
|[[file:050-NinjaMonkey.png|100px|(description text to be added soon)]]<br />[[Grand Saboteur]]<br />($22,000) |
||
| Line 605: | Line 593: | ||
|[[file:050-BananaFarm.png|100px|(description text to be added soon)]]<br />[[Monkey-Nomics]]<br />($100,000) |
|[[file:050-BananaFarm.png|100px|(description text to be added soon)]]<br />[[Monkey-Nomics]]<br />($100,000) |
||
|- |
|- |
||
| − | |[[file:001-BananaFarm.png|100px| |
+ | |[[file:001-BananaFarm.png|100px|The collect radius of Bananas is larger. For Monkey Banks, glows when bank is full and ready to collect.]]<br />[[EZ Collect]]<br />($250) |
|[[file:002-BananaFarm.png|100px|(description text to be added soon)]]<br />[[Banana Salvage]]<br />($200) |
|[[file:002-BananaFarm.png|100px|(description text to be added soon)]]<br />[[Banana Salvage]]<br />($200) |
||
|[[file:003-BananaFarm.png|100px|(description text to be added soon)]]<br />[[Marketplace]]<br />($2900) |
|[[file:003-BananaFarm.png|100px|(description text to be added soon)]]<br />[[Marketplace]]<br />($2900) |
||
| Line 628: | Line 616: | ||
|[[file:003-SpikeFactory.png|100px|(description text to be added soon)]]<br />[[Long Life Spikes]]<br />($1400) |
|[[file:003-SpikeFactory.png|100px|(description text to be added soon)]]<br />[[Long Life Spikes]]<br />($1400) |
||
|[[file:004-SpikeFactory.png|100px|(description text to be added soon)]]<br />[[Deadly Spikes]]<br />($3500) |
|[[file:004-SpikeFactory.png|100px|(description text to be added soon)]]<br />[[Deadly Spikes]]<br />($3500) |
||
| − | |[[file:005-SpikeFactory.png|100px|(description text to be added soon)]]<br />[[Permaspike]]<br />($ |
+ | |[[file:005-SpikeFactory.png|100px|(description text to be added soon)]]<br />[[Permaspike]]<br />($30,000) |
|- |
|- |
||
| rowspan="3" |[[file:000-MonkeyVillage.png|100px|(description text to be added soon)]]<br />[[Monkey Village]]<br />($1200) |
| rowspan="3" |[[file:000-MonkeyVillage.png|100px|(description text to be added soon)]]<br />[[Monkey Village]]<br />($1200) |
||
| − | |[[file:100-MonkeyVillage.png| |
+ | |[[file:100-MonkeyVillage.png|x100px|(description text to be added soon)]]<br />[[Bigger Radius]]<br />($400) |
| − | |[[file:200-MonkeyVillage.png| |
+ | |[[file:200-MonkeyVillage.png|x100px|(description text to be added soon)]]<br />[[Jungle Drums]]<br />($1500) |
| − | |[[file:300-MonkeyVillage.png| |
+ | |[[file:300-MonkeyVillage.png|x100px|(description text to be added soon)]]<br />[[Primary Training]]<br />($800) |
| − | |[[file:400-MonkeyVillage.png| |
+ | |[[file:400-MonkeyVillage.png|x100px|(description text to be added soon)]]<br />[[Primary Mentoring]]<br />($2500) |
| − | |[[file:500-MonkeyVillage.png| |
+ | |[[file:500-MonkeyVillage.png|x100px|(description text to be added soon)]]<br />[[Primary Expertise]]<br />($25,000) |
| + | |- |
||
| + | |[[file:010-MonkeyVillage.png|x100px|(description text to be added soon)]]<br />[[Grow Blocker]]<br />($250) |
||
| + | |[[file:020-MonkeyVillage.png|x100px|(description text to be added soon)]]<br />[[Radar Scanner]]<br />($2000) |
||
| + | |[[file:030-MonkeyVillage.png|x100px|(description text to be added soon)]]<br />[[Monkey Intelligence Bureau]]<br />($7500) |
||
| + | |[[file:040-MonkeyVillage.png|x100px|(description text to be added soon)]]<br />[[Call to Arms]]<br />($20,000) |
||
| + | |[[file:050-MonkeyVillage.png|x100px|(description text to be added soon)]]<br />[[Homeland Defense]]<br />($40,000) |
||
| + | |- |
||
| + | |[[file:001-MonkeyVillage.png|x100px|(description text to be added soon)]]<br />[[Monkey Business]]<br />($500) |
||
| + | |[[file:002-MonkeyVillage.png|x100px|(description text to be added soon)]]<br />[[Monkey Commerce]]<br />($500) |
||
| + | |[[file:003-MonkeyVillage.png|x100px|(description text to be added soon)]]<br />[[Monkey Town]]<br />($10,000) |
||
| + | |[[file:004-MonkeyVillage.png|x100px|(description text to be added soon)]]<br />[[Monkey City]]<br />($3000) |
||
| + | |[[file:005-MonkeyVillage.png|x100px|(description text to be added soon)]]<br />[[Monkeyopolis]]<br />(<abbr title="where 'n' is number of Banana Farms in range">n</abbr> * $5,000) |
||
| + | |- |
||
| + | | rowspan="3" |[[file:000-EngineerMonkey.png|100px|(description text to be added soon)]]<br />[[Engineer Monkey]]<br />($450) |
||
| + | |[[file:100-EngineerMonkey.png|x100px|Creates temporary sentry guns and deploys them nearby.]]<br />[[Sentry Gun]]<br />($500) |
||
| + | |[[file:200-EngineerMonkey.png|x100px|Increased build speed produces sentries more often.]]<br />[[Faster Production]]<br />($400) |
||
| + | |[[file:300-EngineerMonkey.png|x100px|Increased sentry gun and Engineer attack speed.]]<br />[[Sprockets]]<br />($525) |
||
| + | |[[file:400-EngineerMonkey.png|x100px|Sentries deploy with different damage types based on your need.]]<br />[[Sentry Expert]]<br />($2,500) |
||
| + | |[[file:500-EngineerMonkey.png|x100px|Creates super-powerful but highly unstable sentries.]]<br />[[Sentry Paragon]]<br />($32,000) |
||
|- |
|- |
||
| − | |[[file:010- |
+ | |[[file:010-EngineerMonkey.png|x100px|Shoots further and deploys sentries in a much larger area.]]<br />[[Larger Service Area]]<br />($550) |
| − | |[[file:020- |
+ | |[[file:020-EngineerMonkey.png|x100px|Nail gun shots do extra damage to MOAB-Class and Fortified Bloons.]]<br />[[Deconstruction]]<br />($200) |
| − | |[[file:030- |
+ | |[[file:030-EngineerMonkey.png|x100px|Sprays foam that removes Regrow and Camo and pops Lead Bloons.]]<br />[[Cleansing Foam]]<br />($800) |
| − | |[[file:040- |
+ | |[[file:040-EngineerMonkey.png|x100px|Overclock Ability: Target Monkey becomes super powered for a short time.]]<br />[[Overclock]]<br />($13,500) |
| − | |[[file:050- |
+ | |[[file:050-EngineerMonkey.png|x100px|Overclocked Monkeys gain a small but permanent boost each time Overclock wears off.]]<br />[[Ultraboost]]<br />($120,000) |
|- |
|- |
||
| − | |[[file:001- |
+ | |[[file:001-EngineerMonkey.png|x100px|Massive nails pop 8 bloons at once, and pop Frozen Bloons.]]<br />[[Oversize Nails]]<br />($450) |
| − | |[[file:002- |
+ | |[[file:002-EngineerMonkey.png|x100px|Pins Bloons in place for a short time when struck.]]<br />[[Pin]]<br />($220) |
| − | |[[file:003- |
+ | |[[file:003-EngineerMonkey.png|x100px|Two guns for twice the fun.]]<br />[[Double Gun]]<br />($500) |
| − | |[[file:004- |
+ | |[[file:004-EngineerMonkey.png|x100px|Bloon Trap captures Bloons until full. Select to empty full trap for cash.]]<br />[[Bloon Trap]]<br />($3500) |
| − | |[[file:005- |
+ | |[[file:005-EngineerMonkey.png|x100px|Huge Bloon Traps can trap some of the largest Bloons in them...]]<br />[[XXXL Trap]]<br />($60,000) |
|} |
|} |
||
Revision as of 13:57, 21 May 2020
| Article stub This article is a stub. You can help Bloons Wiki by expanding it. |
Upgrades are purchasable items that are bought with money. They give the tower that they are bought for an improvement.


Upgrades
Bloons Tower Defense 3
Dart Monkey
Upgrades:
- Long Range Darts: Increases the range of your Dart Monkey. Costs $75 on Easy, $90 on Medium and $95 on Hard.
- Extra Long Range Darts: Gives the monkey even more throwing distance. Costs $75 on Easy, $90 on Medium and $95 on Hard.
- Piercing Darts: Pops 3 bloons instead of 2. Costs $120 on Easy, $145 on Medium and $150 on Hard.
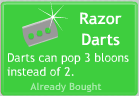
- Razor Darts: Pops 3 bloons instead of 2. Costs $100 on Easy, $120 on Medium and $130 on Hard.
Tack Shooter
Upgrades:
- Faster Shooting: Makes tack shoot faster. Costs $170 on Easy, $205 on Medium and $215 on Hard.
- Blade Shooter: Shoots blades instead of tacks! Costs $155 on Easy, $185 on Medium and $195 on Hard.
- Extra Range: Covers a larger area than normal. Costs $85 on Easy, $100 on Medium and $110 on Hard.
- Super Range: Covers a huge area! Costs $85 on Easy, $100 on Medium and $110 on Hard.
Boomerang Thrower
Upgrades:
- Multi Target: Boomerang will hit up to 5 bloons at once. Costs $230 on Easy, $275 on Medium and $290 on Hard.
- Glaive Thrower: Glaives slice through up to 8 bloons at once! Costs $240 on Easy, $285 on Medium and $300 on Hard.
- Sonic Boom: Sonic boomerangs smash through frozen bloons. Costs $130 on Easy, $155 on Medium and $160 on Hard.
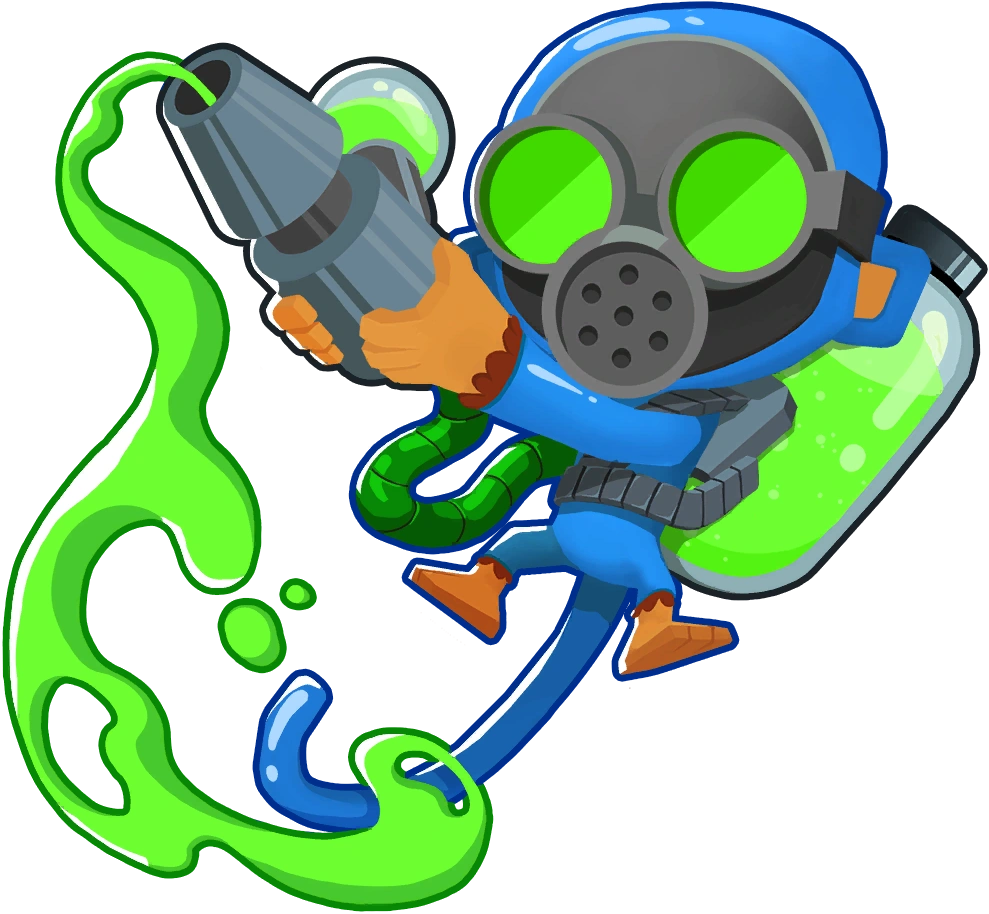
- Thermite: Thermite can melt through lead bloons. Costs $100 on Easy, $120 on Medium and $130 on Hard.
Spike-o-pult
Upgrades:
- Longer Range: Increases maximum range of Spike-o-pult. Costs $215 on Easy, $250 on Medium and $270 on Hard.
- Juggernaut: Spike-o-pult balls roll much further. Costs $700 on Easy, $840 on Medium and $890 on Hard.
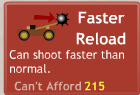
- Faster Reload: Can shoot faster than normal. Costs $215 on Easy, $255 on Medium and $270 on Hard.
- Multi Shot: Shoots three spikey balls at once! Costs $490 on Easy, $585 on Medium and $620 on Hard.
Cannon
Upgrades:
- Bigger Bombs: Big bombs affect a larger area. $365 on Easy, $440 on Medium and $465 on Hard.
- Frag Bombs: Fragments fly out and pop even more bloons! $185 on Easy, $225 on Medium and $240 on Hard.
- Extra Range Bombs: Can shoot bombs further than normal. $170 on Easy, $205 on Medium and $215 on Hard.
- Missile Launcher: Missiles fly super fast. Costs $180 on Easy, $215 on Medium and $225 on Hard.
Ice Ball
Upgrades:
- Longer Freeze: Bloons stay frozen for longer. Costs $215 on Easy, $255 on Medium and $270 on Hard.
- Permafrost: Slows down bloons even after they thaw out! Costs $215 on Easy, $255 on Medium and $270 on Hard.
- Wider Freeze Radius: Pops 1 layer of bloons and then freezes. Costs $170 on Easy, $205 on Medium and $215 on Hard.
- Snap Freeze: Freezes so violently that some bloons will pop before freezing! Costs $245 on Easy, $295 on Medium and $315 on Hard.
Monkey Beacon
Upgrades:
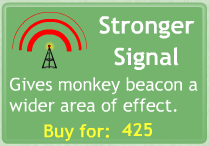
- Stronger Signal: Gives monkey beacon a wider area of effect. Costs $425 on Easy, $510 on Medium and $540 on Hard.
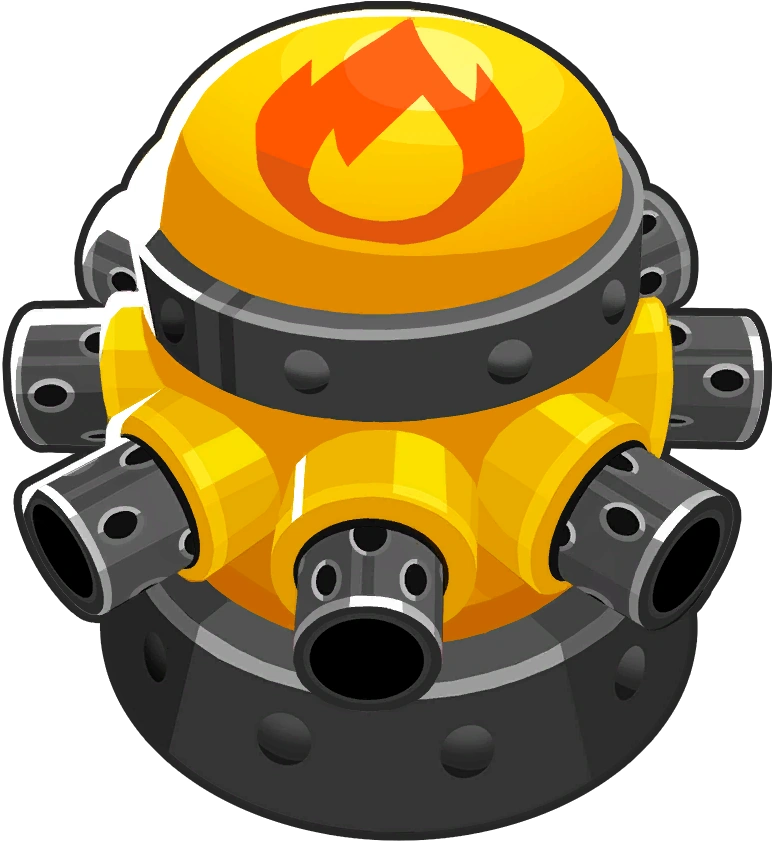
- Jungle Drums: Gives a boost to attack rate to towers within its range. Costs $1275 on Easy, $1530 on Medium and $1620 on Hard.
- Monkey Storm Beacon: Can call Super Monkey Storms! Costs $2125 on Easy, $2550 on Medium and $1700 on Hard.
Super Monkey
Upgrades:
- Laser Vision: Laser can pop 2 bloons at once, and pop frozen bloons. Costs $2975 on Easy, $3570 on Medium and $3780 on Hard.
- Plasma Vision: Plasma vaporizes everything it touches! Costs $3400 on Easy, $4080 on Medium and $4320 on Hard.
- Super Range: Super Range can cover nearly half the screen. Costs $850 on Easy, $1020 on Medium and $1080 on Hard.
- Epic Range: Epic range allows almost whole map coverage! Costs $1190 on Easy, $1430 on Medium and $1510 on Hard.
Bloons Tower Defense 4
(note: this section is unfinished)
Dart Monkey
Upgrades:
- Piercing Darts: Cost: $140 Darts can pop two Bloons instead of one.
- Long Range Darts Cost: $90 Gives the monkey more throwing distance.
- Spike-O-Pult Cost: $300 Gives the monkey a catapult that hurls giant spiked balls.
- Triple Shot Cost: $1,000 Spike-O-Pult becomes three times as deadly.
Tack Shooter
Upgrades
- Faster Shooting Cost: $210 Increases the fire rate of the Tack Shooter.
- Extra Range Cost: $100 Increases the attack radius of the Tack Shooter.
- Blade Shooter Cost: $280 Shoots razor sharp bladed discs instead of tacks!
- Ring of Fire Cost: $2,500 Throws out a fiery hot burst of flame that can pop anything.
Boomerang Thrower
Upgrades
- Multi Target Cost: $250 Boomerang will hit up to seven Bloons at once.
- Sonic Boom Cost: $100 Sonic boomerangs smash through frozen Bloons.
- Glaive Thrower Cost: $280 Glaives slice through up to twelve Bloons at once!
- Lightsabre Thrower Cost: $1,850 Lightsabre slices through anything and everything up to seventy Bloons at once!
Mortar Tower Upgrades:
- Greater accuracy: Increases accuracy of mortars.
- Rapid reload: Increases fire rate.
- Bloon buster: Smashes through 2 layers of bloons.
- Mortar battery: Shoots 3x faster.
Glue Gunner
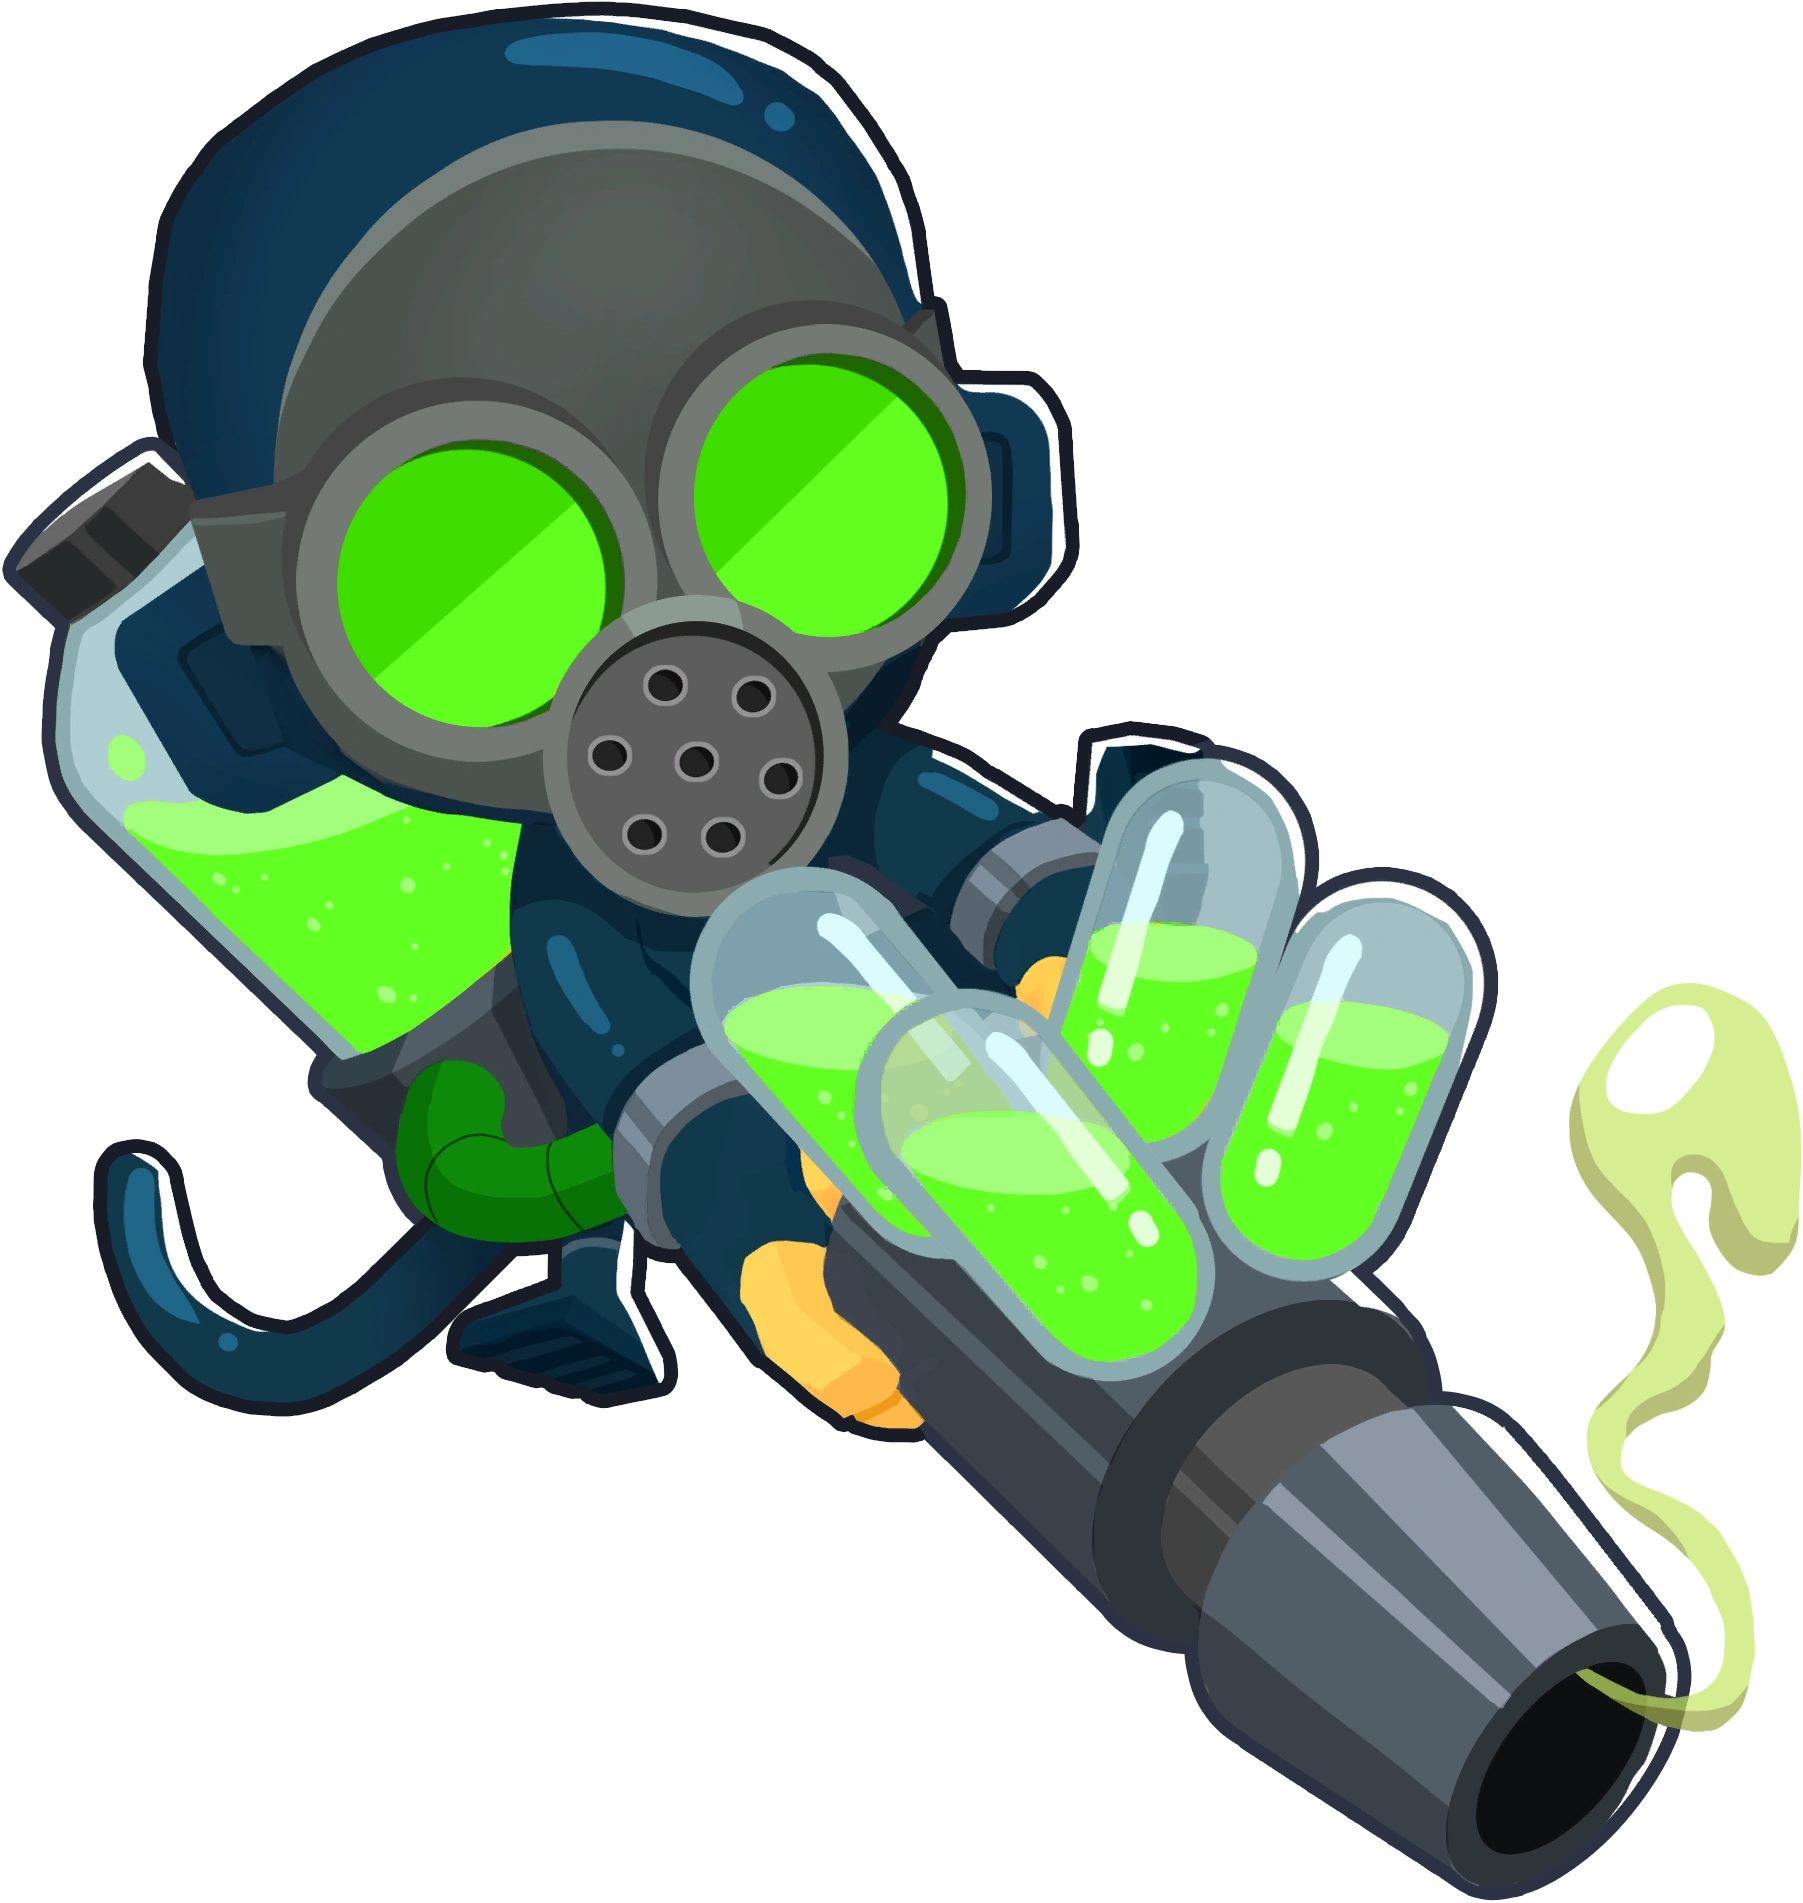
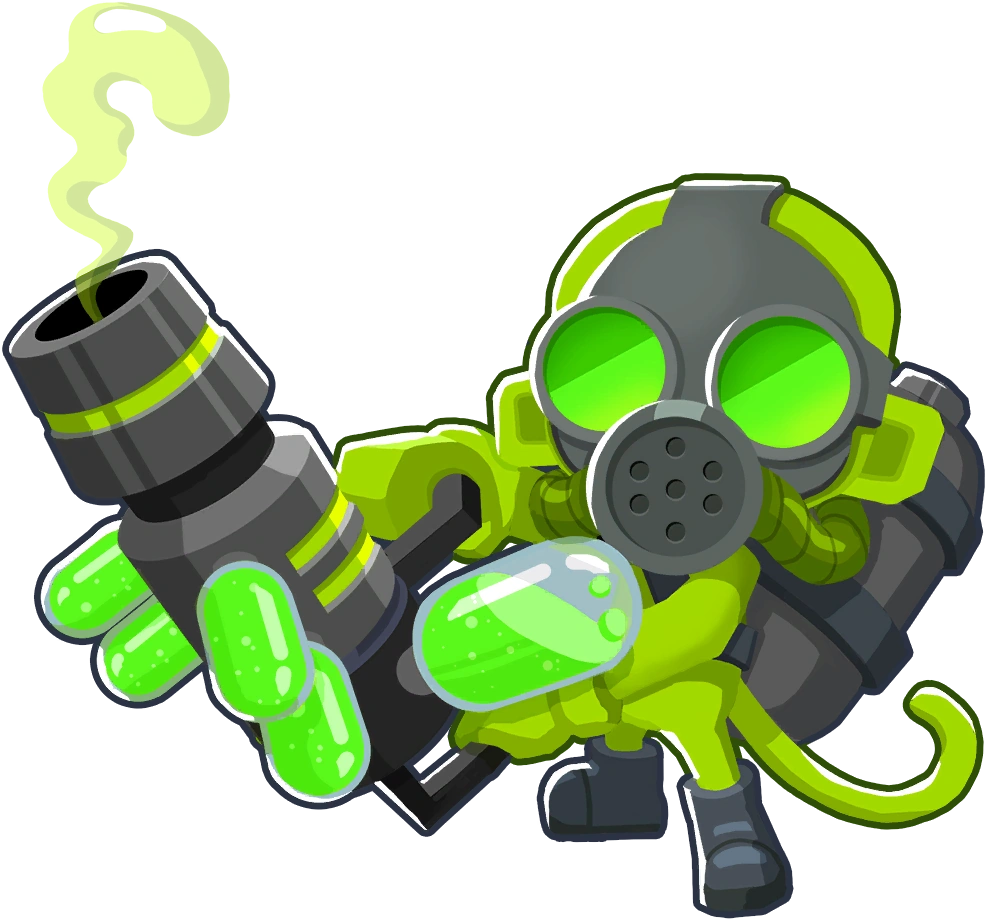
Upgrades:
- Stickier glue: Glue lasts longer
- Glue soak: Glue goes through all the layers of bloons.
- Corrosive glue: Pops bloons every 2 seconds.
- Glue splatter: Glue splashes affecting up to 20 bloons.
Monkey Ace
Upgrades:
- Pineapple express: Sometimes drops explosive pineapples on the map.
- Spy plane: Allows detection of camo bloons near the plane.
- Rapid fire: Shoots faster.
- Operation: Dart storm: Shoots twice as many darts.
Monkey Buccaneer
Upgrades:
- Grape shot: Adds a small volley of grapes to the shot.
- Crow's nest: Allows detection of camo bloon within its radius.
- Longer cannons: Increases range.
- Battle ship: Shoots 3x faster.
Monkey Apprentice
Upgrades:
- Intense magic: Pops 7 bloons instead of 2.
- Fireball: Throws a fireball that explodes on impact.
- Summon whirlwind: Causes a whirlwind that sends bloons back the map but thaws out and removes glue.
- Tempest tornado: Massive whirlwind that sends back bloons and pops up to 120.
Super Monkey
Upgrades:
- Super range: Greatly increase range.
- Laser vision: Can pop 2 bloons at once and frozen bloons.
- Plasma vision: Shoots twice as fast and destroys anything it touches.
- Sun god: Shoots 3 golden beams in a spread pattern obliterating everything.
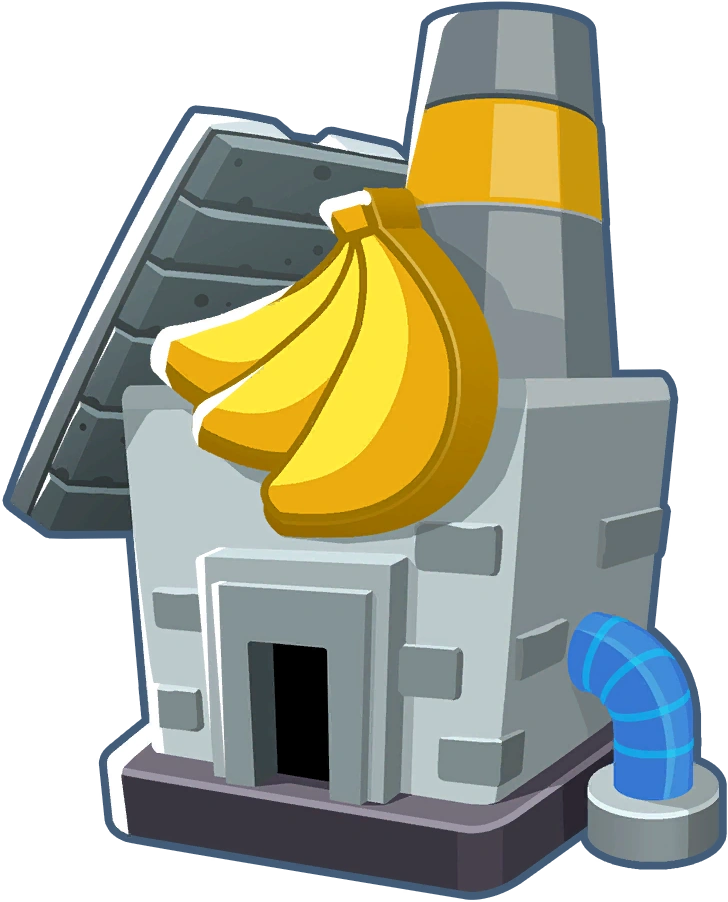
Banana Farm
Upgrades:
- More bananas: Gives 120 money per round.
- Banana plantation: Gives 250 money per round.
- Banana republic: Gives 500 money per round.
- Banana research facility Gives 2000 money per round.
Dartling Gun
Upgrades:
- Steady Firing: Lowers the firing spread.
- Powerful Shots: Makes darts fly out with greater speed, and makes them pop 3 bloons at once.
- Increased Barrel Spin: Increases the gun's fire rate.
- Laser Cannon: Converts to a cannon that shoots super powerful beams able to cause massive bloon damage.
Spike Factory
Upgrades:
- Bigger Stacks: More stacks= win
- White Hot Spikes: Now, tacks could pop lead bloons
- Faster Production: Produces tacks faster
- Spike Storm: Every 20 seconds, the factory generates a storm of short-lived tacks filling up the entire track.
Bloons Tower Defense 5
Dart Monkey
Upgrades:
Path 1
- Long Range Darts: Increase range.
- Enhanced Eyesight: Further increase range and can detect camo.
- Spike-O-Pult: Become a spike-o-pult, shoots spiked ball which can pop up to 18 bloons and increase range but decrease attack speed.
- Juggernaut: Spiked ball become bigger, and able pop up to 100 bloons, included frozen and lead, and 5 damage to ceramics.
Path 2
- Sharp Shots: Extra 1 pierce.
- Razor Sharp Shots: Extra 2 pierces.
- Triple Darts: Now throw 3 darts.
- Super Monkey Fan Club: Ability: Converts upt o 10 nearby dart monkeys into Super Monkeys for 15s.
Tack Shooter
Upgrades:
Path 1
- Faster Shooting: Shoot faster.
- Even Faster Shooting: Shoot even faster.
- Tack Sprayer: Shoot 16 tacks now.
- Ring of Fire: Shoots out a ring that pops 60 bloons, included frozen and lead bloons. Also increase range.
Path 2
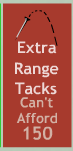
- Extra Range Tacks: Increase range.
- Super Range Tacks: Further increase range.
- Blade Shooter: Shoots blades. Bigger, and more pierce.
- Blade Maelstrom: Ability: Covers the screen in unstoppable blades.
Bloons Tower Defense 5 Mobile
- Main article: Tower and upgrade stats (BTD5M, BMCM and Battles Mobile)
Bloons Tower Defense 6
Below are a list of upgrades in BTD6. Hover over the image to read the official description of the selected upgrade. Click on the hyperlink of the selected upgrade name to read more information of that particular upgrade.
Note: Upgrades prices are valid as of Version 16.2. Most of the descriptions (some of which are incompleted) are valid as of Version 16.2. Prices are shown in Medium Difficulty.


