| “ | The Bloons will look upon my Glaives, and they will know fear. | ” |
| ~ BTD6 description |
Glaive Dominus is the Paragon upgrade of the Boomerang Monkey that was added to Bloons TD 6 in the 27.0 update. Combining major features from the Glaive Lord, Perma Charge, and MOAB Domination, the Glaive Dominus throws super-fast, ricocheting glaives that deal massive damage to MOAB class bloons over time. Orbiting the Glaive Dominus are three large glaive rings which spin faster when bloons are nearby. In addition, the Glaive Dominus will periodically throw heavy, knockback glaives at MOAB class bloons which explode upon impact. All of these attacks deal enormous damage to all bloon types (including camo), with bonus damage to Boss Bloons, MOAB class bloons, and Ceramic Bloons. As of v36.0, the Glaive Dominus improves the attack speed of all Primary Monkeys excluding itself, but including Paragons, by +11.1%.
The Glaive Dominus is obtained by having one of each Tier 5 Boomerang Monkey on screen, at which point, the upgrade icon for the Glaive Dominus will become available on any of the tier 5 Boomerang Monkeys. Purchasing the upgrade will change the selected Boomerang Monkey into the Glaive Dominus, while sacrificing every other Boomerang Monkey on screen (including those belonging to co-op players). Only one Glaive Dominus may exist at a time.
The "power" or degree of the Glaive Dominus ranges from 1-100 and is determined by total cost, pop count, tier 5 upgrades, and non-tier 5 upgrades of Boomerang Monkeys sacrificed as explained here. As with most Paragons, the Glaive Dominus cannot receive buffs from any external sources except for the "Paragon of Power" Monkey Knowledge (and from bloon debuffing status effects such as the "Cripple MOAB" or "Super Brittle" debuffs). Additionally, Glaive Dominus is unavailable in Sandbox Mode until it is created in a real game, but can always be created in Challenge Editor.
Upgrading to this Paragon costs $233,750 on Easy, $275,000 on Medium, $297,000 on Hard, $330,000 on Impoppable. To max out on manual cash sacrifices starting from v39.0, the player must spend at least $701,250 on Easy, $825,000 on Medium, $891,000 on Hard, and $990,000 on Impoppable; before v39.0, the max cash sacrifices was $250,000. With max slider, these costs increase to $736,312 on Easy, $866,250 on Medium, $935,550 on Hard, and $1,039,500 on Impoppable.
Description[]
Overview[]

Glaive Dominus and all three Tier 5 Boomerang Monkeys
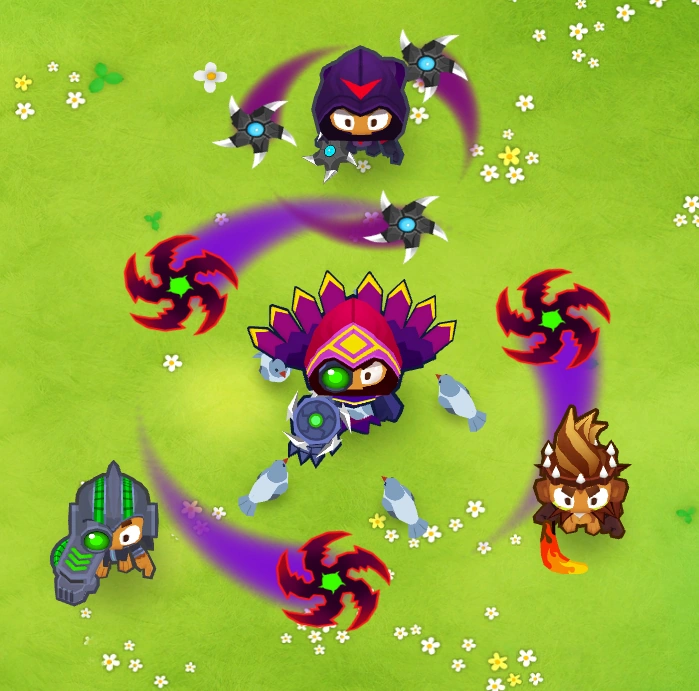
The Glaive Dominus is a cloaked, tribal-cybernetic master who wields a powerful arm to rapidly fire ricocheting glaives and knockback Kylie boomerangs. In addition, there is a ring of three massive glaives orbiting the Glaive Dominus at all time. The hood of the Paragon is stitched in deep shades of magenta with frills at the edge of the cloak that resemble a peacock's tail. The orbital glaives, bionic eye and arm all have bright green centers, representing a machine core to the Glaive Dominus. In this way, the Glaive Dominus incorporates the technological, tribal, and spiritual visual elements from all three of its constituent towers. The Glaive Dominus performs a head-roll and looks side to side as part of its idle animations.
Every 20 degrees, the Glaive Dominus gains a more ornate appearance with different hood diamond colors, spikier tails, the tails of the cloak gaining spikes and changing color, the technological eye gaining a flame effect, and horns appearing on the cloak.
Like other Paragons, these visual elements are derived from the constituent Tier 5 towers, for example: the Glaive Lord's rotating rings, the Perma-Charge's cybernetic enhancements, and the MOAB Domination's tribal appearance. Likewise, the name "Glaive Dominus" is formed from the Glaive in "Glaive Lord" and Domination in "MOAB Domination". There is no clear incorporation of the name "Perma-Charge".
Targeting Priorities[]
Glaive Dominus targets bloons using the standard targeting priorities. It has multiple types of attacks that are shot in different styles.
- First: Targets the first bloon visible within its range.
- Last: Targets the last bloon visible within its range.
- Close: Targets the closest bloon visible within its range.
- Strong: Targets the strongest bloon visible within its range.
The hypersonic ricocheting glaive attack is shot in a straight movement, and can sharply turn to another bloon with aggressive seeking. Orbital glaives are zone-based and locked on Close. The anti-MOAB glaives are shot in a straight movement, can be shot at extended range, but can only target MOAB-class bloons.
Despite being able to detect Camo Bloons naturally, Glaive Dominus does not have the Camo Prioritization targeting priority.
Monkey Knowledge Interactions[]
| Interactions with MK? Some entries, such as the Hard Press, Extra Bounce, and Recurring Rangs need verification (Wingmonkey is proven to affect Doomship). |
The following Monkey Knowledge Points directly affect the Glaive Dominus:
 Recurring 'Rangs: Boomerangs that return to the Boomerang Monkey will be thrown a second time.
- Extra Bounce: Increases the pierce of ricocheting Glaives by 30.
- Pierce 100 → 130.
- Hard Press: Glaive Dominus special knockback boomerangs push back 30% further.
- Better Sell Deals: All Monkeys sell for 5% more.
- Increases sell potency from 70% to 75%.
- Veteran Monkey Training: All Monkeys reload time reduced by 3%.
- Paragon of Power: Any paragon will gain a large boost to its attack speed so long as you have no T5s of the same tower type placed
The following Monkey Knowledge Points do affect Glaive Dominus, but only indirectly:
- Cheap 'Rangs: Base cost of Boomerang Thrower reduced by 50. [note: this is a small benefit for Glaive Dominus]
- Come On Everybody!: Primary towers attack 5% faster if all are below tier 3, and cost 5% less if all are tier 3 or 4.
- Monkey Education: All Monkeys XP earn rate increased by 8%.
Creation[]
")
A base Glaive Dominus can be created by having one of each tier 5 Boomerang Monkey on screen, at which point, the upgrade icon for the Glaive Dominus will become available on any of the tier 5 Boomerang Monkeys. Purchasing the upgrade will change the selected Boomerang Monkey into the Glaive Dominus, while sacrificing every other Boomerang Monkey on screen (including those belonging to co-op players). Only one Glaive Dominus may exist at a time.
Paragon Power[]
The degree of the Glaive Dominus depends on a hidden value known as "power", which itself depends on the amount of tier 5 upgrades, non-tier 5 upgrades, cash, and pops of sacrificed Boomerang Monkeys, as well as any Paragon Power Totems on the map. In addition to cosmetic changes every 20 degrees, a higher degree will elevate the damage output of the Glaive Dominus. Power is calculated as follows:
- Each Tier 5 Boomerang Monkey will contribute 6,000 power for a maximum of 50,000 power (9 Tier 5 upgrades). Excludes the first three Tier 5 Boomerang Monkeys.
- Each non-Tier 5 Boomerang Monkey upgrade will contribute 100 power for a maximum of 10,000 power (100 non-Tier 5 upgrades). Excludes the first three Tier 5 Boomerang Monkeys.
- Every $11.6875 / $13.75 / $14.85 / $16.5 spent on sacrificed Boomerang Monkeys will contribute 1 power for a maximum of 60,000 power ($701,250 / $825,000 / $891,000 / $935,550 spent). Excludes the three cheapest Tier 5 Boomerang Monkeys.
- Alternatively, cash can be injected into the Paragon directly with 5% reduced efficiency.
- Every 180 pops achieved by sacrificed Boomerang Monkeys will contribute 1 power for a maximum of 90,000 power (16,200,000 pops). [1] Includes the first three Tier 5 Boomerang Monkeys.
- Round 132 is the first round where the game's cumulative RBE exceeds this threshold. Waiting until round 136 before upgrading to Glaive Dominus should provide enough buffer to achieve the 16,200,000 pops, assuming Boomerang Monkeys are responsible for 80% of all pops until that point. These rounds will be earlier on Double HP MOABs or Boss Events due to the increased RBE from Boss Bloons and MOABs, so it is always best to confirm by calculating manually.
- Each Paragon Power Totem contributes an additional 2,000 power, with no limit.
Assuming no Paragon Power Totems, a maximum of 160,000 power is obtainable in single-player, and 210,000 power is achievable in co-op, though only up to 200,000 power is actually used.
Degree roughly scales with the natural logarithm of power, so there is no unique set of upgrades, prices, etc. that will place the Paragon at a certain degree. In addition, the attack speed, pierce, damage, specialized damage, and boss damage each scale differently with the degree.
Statistics[]
The approximate power requirements for the 20 degree increments are listed, alongside the associated damage statistics and some general guidelines on which sacrificial investments to make.
Data updated as of v39.x
All Degrees[]
- 1 Glaive Lord, 1 Perma Charge, 1 MOAB Domination needed
- 60 range
- Same footprint as a Boomerang Monkey
- All attacks deal Normal damage with camo detection
- Throws super fast ricocheting glaives. The first hit of this attack applies a Shred DoT to MOAB-class bloons lasting 15 seconds.
- Three glaives orbit the Glaive Dominus with 50 range, rapidly damaging nearby bloons.
- Periodically fires an anti-MOAB glaive with 100 range that hits multiple times with knockback and explodes, applying a Burn DoT lasting 4 seconds.
- Knockback strength is 1 unit for MOABs, 0.5 units for BFBs, and 0.25 units for DDTs and ZOMGs.
- Gives x0.9 attack cooldown (~+11.1% attack speed) to all Primary towers including Paragons (does not affect itself)
Degree 1 (Base)[]
- 0 Power needed
Main Glaive
- Attacks every 0.04s
- 100 pierce, 20 damage
- 80 Boss damage, 160 Elite Boss damage
- Shred: (750 damage, 750 Boss damage, 1,500 Elite Boss damage)/s
Orbital Glaive
- Attacks every 0.1s
- 1,000 pierce, 42 damage
- 62 ceramic damage, 62 MOAB damage, 212 Boss damage, 424 Elite Boss damage
- 232 Shielded Dreadbloon damage, 464 Elite Shielded Dreadbloon damage
Anti-MOAB Glaive
- Attacks every 3s
- 300 pierce, 1 damage
- 20 MOAB damage, 20 Boss damage, 40 Elite Boss damage
Explosion
- 20 pierce, 2,500 damage
- 6,500 Boss damage, 13,000 Elite Boss damage
- Burn: (500 damage, 500 Boss damage, 1,000 Elite Boss damage)/s
Degree 20[]
- At least 11,032 Power needed
- Buying 23 2-0-2 Boomerang Monkeys achieves Degree 20 on all difficulties.
- If using only the cash slider, spending a total of ~1.6x the Paragon's base cost should comfortably get Degree 20 on all difficulties.
Main Glaive
- Attacks roughly every 0.0306s
- 138 pierce, 24.8 damage
- 105.4 Boss damage, 210.8 Elite Boss damage
- Shred: (893.5 damage, 1,116.9 Boss damage, 2,233.8 Elite Boss damage)/s
Orbital Glaive
- Attacks roughly every 0.0764s
- 1,209 pierce, 51 damage
- 74.8 ceramic damage, 74.8 MOAB damage, 316.6 Boss damage, 633.2 Elite Boss damage
- 346.4 Shielded Dreadbloon damage, 692.7 Elite Shielded Dreadbloon damage
Anti-MOAB Glaive
- Attacks roughly every 2.2932s
- 376 pierce, 2.2 damage
- 24.8 MOAB damage, 31 Boss damage, 62 Elite Boss damage
Explosion
- 42.8 pierce, 2,976 damage
- 9,670 Boss damage, 19,340 Elite Boss damage
- Burn: (596 damage, 745 Boss damage, 1,490 Elite Boss damage)/s
Degree 40[]
- At least 31,360 Power needed
- Buying 28 2-4-0 Boomerang Monkeys achieves Degree 40 on all difficulties.
- Use the cash slider to make up the cost for any missing non-tier 5 Boomerang Monkeys, as long as you have 100 non-tier 5 Boomerang Monkey upgrades.
- If using only the cash slider, spending a total of ~2.7x the Paragon's base cost should comfortably get Degree 40 on all difficulties.
Main Glaive
- Attacks roughly every 0.0277s
- 178 pierce, 30.8 damage
- 150.5 Boss damage, 300.9 Elite Boss damage
- Shred: (1,045.5 damage, 1,568.3 Boss damage, 3,136.5 Elite Boss damage)/s
Orbital Glaive
- Attacks every 0.0694s
- 1,429 pierce, 61.4 damage
- 89.2 ceramic damage, 89.2 MOAB damage, 446.5 Boss damage, 893 Elite Boss damage
- 488.2 Shielded Dreadbloon damage, 976.4 Elite Shielded Dreadbloon damage
Anti-MOAB Glaive
- Attacks every 2.081s
- 456 pierce, 4.4 damage
- 30.8 MOAB damage, 46.2 Boss damage, 92.4 Elite Boss damage
Explosion
- 66.8 pierce, 3,478 damage
- 13,557 Boss damage, 27,114 Elite Boss damage
- Burn: (698 damage, 1,047 Boss damage, 2,094 Elite Boss damage)/s
Degree 60[]
- At least 66,387 Power needed
- Buying 52 2-4-0 Boomerang Monkeys achieves Degree 60 on all difficulties.
- Use the cash slider to make up the cost for any missing non-tier 5 Boomerang Monkeys, as long as you have 100 non-tier 5 Boomerang Monkey upgrades.
Main Glaive
- Attacks every 0.0259s
- 218 pierce, 36.8 damage
- 203.5 Boss damage, 407.1 Elite Boss damage
- Shred: (1,197.5 damage, 2,095.6 Boss damage, 4,191.3 Elite Boss damage)/s
Orbital Glaive
- Attacks every 0.0648s
- 1,649 pierce, 71.8 damage
- 103.6 ceramic damage, 103.6 MOAB damage, 598.6 Boss damage, 1,197.3 Elite Boss damage
- 650.8 Shielded Dreadbloon damage, 1,300.6 Elite Shielded Dreadbloon damage
Anti-MOAB Glaive
- Attacks every 1.9441s
- 536 pierce, 6.6 damage
- 36.8 MOAB damage, 64.4 Boss damage, 128.8 Elite Boss damage
Explosion
- 90.8 pierce, 3,980 damage
- 18,095 Boss damage, 36,190 Elite Boss damage
- Burn: (800 damage, 1,400 Boss damage, 2,800 Elite Boss damage)/s
Degree 80[]
- At least 120,115 Power needed
- Buying 55 2-4-0 Boomerang Monkeys and accumulating 9,020,700 pops across all Boomerang Monkeys achieves Degree 80 on all difficulties.
- Use the cash slider to make up the cost for any missing non-tier 5 Boomerang Monkeys, as long as you have 100 non-tier 5 Boomerang Monkey upgrades.
Main Glaive
- Attacks every 0.0246s
- 258 pierce, 42.8 damage
- 264.6 Boss damage, 529.2 Elite Boss damage
- Shred: (1,349.5 damage, 2,699 Boss damage, 5,398 Elite Boss damage)/s
Orbital Glaive
- Attacks every 0.0614s
- 1,869 pierce, 82.2 damage
- 118 ceramic damage, 118 MOAB damage, 773 Boss damage, 1,545.9 Elite Boss damage
- 844.6 Shielded Dreadbloon damage, 1,689.1 Elite Shielded Dreadbloon damage
Anti-MOAB Glaive
- Attacks every 1.8422s
- 616 pierce, 8.8 damage
- 42.8 MOAB damage, 85.6 Boss damage, 171.2 Elite Boss damage
Explosion
- 114.8 pierce, 4,482 damage
- 23,284 Boss damage, 46,568 Elite Boss damage
- Burn: (902 damage, 1,804 Boss damage, 3,608 Elite Boss damage)/s
Degree 91 (Single Player Max w/o Geraldo)[]
- At least 159,085 Power needed
- Buying 55 2-4-0 Boomerang Monkeys and accumulating 16,200,000 pops across all Boomerang Monkeys achieves Degree 91 on all difficulties.
- Use the cash slider to make up the cost for any missing non-tier 5 Boomerang Monkeys, as long as you have 100 non-tier 5 Boomerang Monkey upgrades.
Main Glaive
- Attacks every 0.0239s
- 280 pierce, 47 damage
- 284 Boss damage, 568 Elite Boss damage
- Shred: (1,434 damage, 2,868 Boss damage, 5,736 Elite Boss damage)/s
Orbital Glaive
- Attacks every 0.0599s
- 1,990 pierce, 88.8 damage
- 126.8 ceramic damage, 126.8 MOAB damage, 823.6 Boss damage, 1,647.2 Elite Boss damage
- 899.6 Shielded Dreadbloon damage, 1,799.2 Elite Shielded Dreadbloon damage
Anti-MOAB Glaive
- Attacks every 1.7955s
- 660 pierce, 10.9 damage
- 47 MOAB damage, 94 Boss damage, 188 Elite Boss damage
Explosion
- 128 pierce, 4,759 damage
- 24,718 Boss damage, 49,436 Elite Boss damage
- Burn: (959 damage, 1,918 Boss damage, 3,836 Elite Boss damage)/s
Degree 100 (Max)[]
- 200,000 Power needed
- Buying 55 2-4-0 Boomerang Monkeys along with either 9 tier 5 Boomerang Monkeys (only possible on co-op), 20 Paragon Power Totems, or a mix of the two, and accumulating 16,200,000 pops across all Boomerang Monkeys achieves Degree 100 on all difficulties.
- Use the cash slider to make up the cost for any missing non-tier 5 Boomerang Monkeys, as long as you have 100 non-tier 5 Boomerang Monkey upgrades.
Main Glaive
- Attacks every 0.0235s
- 300 pierce, 50 damage
- 382.5 Boss damage, 765 Elite Boss damage
- Shred: (1,510 damage, 3,397.5 Boss damage, 6,795 Elite Boss damage)/s
Orbital Glaive
- Attacks every 0.0587s
- 2,100 pierce, 94 damage
- 134 ceramic damage, 134 MOAB damage, 976.5 Boss damage, 1,953 Elite Boss damage
- 1,066.5 Shielded Dreadbloon damage, 2,133 Elite Shielded Dreadbloon damage
Anti-MOAB Glaive
- Attacks every 1.761s
- 700 pierce, 12 damage
- 50 MOAB damage, 112.5 Boss damage, 225 Elite Boss damage
Explosion
- 140 pierce, 5,010 damage
- 29,272.5 Boss damage, 68,545 Elite Boss damage
- Burn: (1,010 damage, 2,272.5 Boss damage, 4,545 Elite Boss damage)/s
Troubleshooting[]
Costs[]
Like all Paragons, which are able to sacrifice other towers, Glaive Dominus has a complex set of costs.
Data updated as of Version 40.2.
Quick Reference Costs[]
Assumes normal undiscounted costs of each tower.
Tower Sacrifices
| Easy | Medium | Hard | Impoppable | |
|---|---|---|---|---|
| Vanilla | $344,440 | $405,230 | $437,640 | $486,275 |
| Degree 20 | $366,865 | $431,680 | $466,275 | $518,015 |
| Degree 40 | $601,599 | $707,767 | $764,385 | $849,321 |
| Maximum Sacrifices | $1,075,785 | $1,265,362 | $1,366,879 | $1,518,759 |
Combos written for the above table:
- Vanilla: The cheapest Glaive Dominus at raw cost, using only 5-0-0, 0-5-0, and 0-0-5.
- Degree 20: The best way to acquire a Degree 20 Glaive Dominus. Uses 23x 0-2-2 Boomerang Monkeys.
- If using Monkey Knowledge, account for Come On Everybody! and purchase the T5s first.
- On Easy Mode, if Cheap 'Rangs is active, buy 23x 2-0-2 Boomerang Monkeys instead.
- If using Monkey Knowledge, account for
- Degree 40: The best way to acquire a Degree 40 Glaive Dominus. Uses 17x 2-4-0 Boomerang Monkeys and a cash injection.
- Reaching Degree 40 with only tower sacrifices requires placing 43 2-4-0 Boomerang Monkeys. This is obviously unfeasible, so if going for a Degree 40 Glaive Dominus, you only need to maximize the upgrade requirements and then spend the rest of the money with the cash slider.
- Maximum Sacrifices: Fully covers non-pop count, non-T5 sacrifices for Glaive Dominus. Uses 17x 2-4-0 Boomerang Monkeys and a cash injection.
- Filling the cash requirement with only tower sacrifices requires placing 120 2-4-0 Boomerang Monkeys. This is obviously unfeasible, so if going for the strongest possible Glaive Dominus, you only need to maximize the upgrade requirements and then spend the rest of the money with the cash slider.
Cost Formula[]
Lists the costs for all Tier 5 Boomerang Monkeys without crosspathing, all Tier 4 Boomerang Monkeys without crosspathing, and all crosspaths up to Tier 2 on all four game modes (Easy, Medium, Hard, Impoppable), along with the power contribution next to each price value. The three cheapest Tier 5 Boomerang Monkeys do not contribute power to the cash requirement.
| Whole Tower Purchase | Easy | Medium | Hard | Impoppable |
|---|---|---|---|---|
| 5-0-0 Total | $29,245 (2,502.246) | $34,405 (2,502.182) | $37,150 (2,501.684) | $41,285 (2,502.121) |
| 0-5-0 Total | $35,185 (3,010.481) | $41,400 (3,010.909) | $44,710 (3,010.774) | $49,680 (3,010.909) |
| 0-0-5 Total | $46,260 (3,958.075) | $54,425 (3,958.182) | $58,780 (3,958.249) | $65,310 (3,958.182) |
| Whole Tower Purchase | Easy | Medium | Hard | Impoppable |
|---|---|---|---|---|
| 4-0-0 Total | $4,255 (364.064) | $5,005 (364) | $5,400 (363.636) | $6,005 (363.939) |
| 0-4-0 Total | $5,435 (465.027) | $6,400 (465.455) | $6,910 (465.32) | $7,680 (465.455) |
| 0-0-4 Total | $3,760 (321.711) | $4,425 (321.818) | $4,780 (321.886) | $5,310 (321.818) |
| T1+T2 Purchase | Easy | Medium | Hard | Impoppable |
|---|---|---|---|---|
| 2-0-0 T1+T2 | $410 (35.08) | $480 (34.909) | $515 (34.68) | $575 (34.848) |
| 0-2-0 T1+T2 | $360 (30.802) | $425 (30.909) | $460 (30.976) | $510 (30.909) |
| 0-0-2 T1+T2 | $340 (29.091) | $400 (29.091) | $435 (29.293) | $480 (29.091) |
Where T(x,y,z) and C(x, y, z) are functions with three parameters corresponding to tier numbers, S1 and similar are the number of Tier 4 upgrades of each path, and L1 and similar are the sums of Tier 2 crosspaths from each of the Tier 4 upgrades:
T(5,0,0) + T(0,5,0) + T(0,0,5) + S1 * T(4,0,0) + S2 * T(0,4,0) + S3 * T(0,0,4) + L1 * C(2,0,0) + L2 * C(0,2,0) + L3 * C(0,0,2)
Substitute each of these functions with the respective tower costs (e.g. Glaive Lord → T(5,0,0) → $37,505 if Medium prices are used). Use Wolfram Alpha or similar to plonk in specific combinations.
Cash Sacrifices[]
- Cash : Power: Ratio of cash required to gain 1 power. Maximum power gained from cash sacrifices is 60,000 power.
- Max Manual Sacrifices: Maximum amount of cash required to max out power via cash sacrifices by only using placed towers, irrespective of possibility in practice.
- Max Slider Sacrifices: Maximum amount of cash required to max out power via cash sacrifices by only using the cash slider.
| Easy | Medium | Hard | Impoppable | |
|---|---|---|---|---|
| Cash : Power | Manual: $11.6875 Slider: $12.271875 |
Manual: $13.75 Slider: $14.4375 |
Manual: $14.85 Slider: $15.5925 |
Manual: $16.5 Slider: $17.325 |
| Max Manual Sacrifices | $701,250 | $825,000 | $891,000 | $990,000 |
| Maximum Slider Sacrifices | $736,312.5 | $866,250 | $935,550 | $1,039,500 |
Strategy[]
Summary[]
 |
Information is out of date. This article's information is out of date. Please improve this article by adding the most current information about the subject of this page. |
Glaive Dominus combines the attacks of the Glaive Lord, Perma Charge, and MOAB Domination to fire a relentless stream of ricocheting glaives that have high pierce and damage. Alongside the powerful glaive rings and exploding knockback glaives, the Glaive Dominus excels at stalling long waves of MOAB class bloons. However, there are severe limitations to this paragon. The high cost of the base tower along with sacrifices makes the Glaive Dominus difficult to obtain in early and mid-game rounds, even with a robust farming setup. For late-game and freeplay past round 140, the Glaive Dominus is quickly outclassed by cheaper combinations of towers (such as Ultraboost and Flying Fortress) due to not being able to receive buffs besides Paragon of Power. As a result, the main use case for a Glaive Dominus is during Boss Events and Late Game where the tower can provide significant Boss Damage as well as MOAB stalling power.
During Boss Fights, a degree 20 Glaive Dominus, at minimum, should be created to reap the benefits of the first power spike in damage-vs-degree scaling. This will lead to efficient boss damage with respect to the investment cost of creating the Glaive Dominus. Place the Glaive Dominus in centrally located areas to maximize time spent attacking the Boss Bloons.
For general late-game use, the Glaive Dominus should be placed near the exit or entrance to quickly catch any escaping/entering MOAB class bloons like DDTs. A max degree Glaive Dominus can be created by having 16,200,000 pops, $250,000 spent (excluding the three tier-5 boomerang monkeys), 100 tier 1-4 upgrades, and 9 (3 in single player) tier 5 upgrades among the sacrificial boomerang monkeys.
Tips[]
- Because the Glaive Dominus is only 10k less expensive than the Apex Plasma Master in terms of collective costs, one should choose between the two wisely.
- Apex Plasma Master is better on maps with lots of obstacles, because the Apex Plasma Master's plasma balls can bounce off obstacles to deal much more damage, while the Glaive Dominus lacks any attacks that benefit from obstacles. Another strong usage is against T3-4 Vortex, because the Apex Plasma Master can get more bounces off when the boss is at the entrance.
- On the contrary, the Glaive Dominus is significantly better on maps with no obstacles where it can be near the track, dealing around double the DPS at Degree 20 than the Degree 30 Apex Plasma Master.
- To get a degree 20 Glaive Dominus with normal and above prices, one can buy 25 0-2-2 boomerangs to fulfill the 100 upgrade tiers requirement and $25,800 cash for a cheap degree 20, which will be enough to get a degree 20 Glaive Dominus. On Easy, turn two of them into tier 3 monkeys to break the $25,800 cash threshold, although more may be necessary with discounts on any difficulty.
- A Glaive Dominus can easily handle any Dreadrock Bloon that spawns from Dreadbloon, even Elite Tier 5, because of his homing glaives.
- Glaive Dominus's Anti-Moab Glaive/heavykylie is a substantial amount of the Dominus's damage and has 100 range, letting it outrange Vortex while still dealing solid damage.
- One additional benefit of the Glaive Dominus is that it buffs all primary towers' attack speed by +11.1% (*0.9 cooldown reduction), including paragons, making it useful for buffing primary heavy strategies and Apex Plasma Master. This should not be the only reason to buy the Glaive Dominus, as it is still a strong Paragon in its own right.
- Debuff status effects, including Cripple MOAB, Super Brittle, Glue Storm, are not very effective if only using paragons, as paragons already do hundreds of damage per hit to bosses, causing them to have a nearly unnoticeable effect on them. Thus, it is only recommended to get them if using non-paragon towers. Compared to Apex Plasma Master, Glaive Dominus synergizes somewhat better with bloon debuffs because of the greater number of hits per second.
- Place the Glaive Dominus in track-central regions during Boss Events as this maximizes time spent attacking Boss Bloons. An example of this would be in the upper right loop on the map Resort. Such an optimal placement is to utilize all the Glaive Dominus' three attacks: main hypersonic glaive attack, glaive ring, and anti-blimp glaives. Highest attention should be prioritized for its explosive glaive, then glaive ring.
- Placement matters for Glaive Dominus, as it still is affected by Line of Sight restrictions. The Knockback and Orbital Glaive will still attack through obstacles.
- Paragons in general can't be sacrificed to a Sun Temple or True Sun God, so they can be placed close together in centrally-located regions.
- Compared with other paragon towers, Boomerang is overall the most disadvantaged in dealing enough damage with its constituent tier 5s and Tier 4s. Its best options are Perma Charge, MOAB Domination, and Turbo Charge.
- To get the $???,000 on Medium valuation of manual sacrifices for Glaive Dominus, one must spend roughly 119.91 worth of 2-4-0 Turbo Charges. Very few maps can support that many Boomers, and even then it requires occupying excessive amounts of the entire available land. For efficient cost sacrifices, place as many as humanly possible and spend the rest on the cash slider.
Version History[]
Balance Changes[]
Glaive Dominus' low damage values across all of its attacks at launch meant it was generally less powerful than Apex Plasma Master for a slightly higher cost, so the value of Glaive Dominus has been increased to make up for this. After buffing Glaive Dominus across multiple updates and nerfing Apex Plasma Master's attack speed, Glaive Dominus now rivals Apex Plasma Master in terms of general use versus Bosses, especially after Version 34.0 substantially reduced its price to compete against the double T5 advantage from Apex Plasma Master. Despite the strength of the Glaive Dominus, it still received a buff in the form of a second paragon buffing interaction, as the Glaive Dominus now reduces the attack cooldown of all primary towers, including paragons, by *0.9 (+11.1% attack speed.) Version 37.0 presented the Glaive Dominus with its very first nerf to help balance its new ability, inherited by all other paragons as well, to slow Lych-Soul, followed with a price swap with the Apex Plasma Master, increasing its upgrade price by a small amount.
Update 39.0 introduced a rework to the paragon system along with a bug fix in bonus damage to boss bloons. To compensate for this, The Dominus received numerous nerfs along with a price reduction.
- 27.0
- Released.
- 28.0
| “ | [...] & finally we're tweaked up some of the numbers on Boomerang Paragon's damage to even out some parts of it that were not contributing effectively | ” |
| ~ Ninja Kiwi |
- Boomerang Paragon burn DoT damage tic increased from 50 -> 100
- Boomerang Paragon Shred DoT damage tic increased from 250 -> 750
- Boomerang Paragon rotating glaive base damage increased from 20 to 42
- [undocumented] Fixed Degrees 1-19 to deal bonus damage to elite bosses.
- [undocumented] Damage-over-time effects now scale damage with degree counts, in turn improving the burn and shred DoTs of Glaive Dominus.
- 29.0
| “ | Separately, we noticed the Glaive Dominus press knockback's actual explosion was only dealing a fraction of the damage of any other part on this upgrade, this combined with it pushing targets out of the tower's radius made it somewhat stally so we juiced up the power of this explosion significantly. | ” |
| ~ Ninja Kiwi |
- Paragon Press Attack: Explosion damage increased from 100 -> 2500
- Paragon Press Attack: Explosion bonus damage to boss + 5000
- Paragon Press Attack: Fire DoT increased from 100 -> 500
- 34.0
| “ | [...] When the Dart & Boomerang paragons were first introduced the more expensive T5 upgrades were not taken into account for balance as much as the raw paragon upgrade cost, in addition to this we have for a long time taken a no-MK approach to general game balance, however paragons have proven that they should follow the opposite of this ideal and be balanced around a max MK assumed approach, due to MK balance the Dart Paragon gains an incredible degree bonus, so we would like to counterbalance some of that advantage in the base Boomerang design by reducing the price greatly. | ” |
| ~ Ninja Kiwi |
- Glaive Dominus price reduced $400,000 → $325,000
- 36.0
| “ | [...] We wanted to include a take on the Boomerang paragon’s range buff improving so much to apply to other primaries along with the buff synergy in the last update, but time didn’t quite allow for it. | ” |
| ~ Ninja Kiwi |
- Indirectly buffed by Glaive Lord price reduction
- Boomerang Paragon grants *0.9 attack rate to other primary towers including paragons
- This is effectively an +11.1% attack speed buff.
- [undocumented] Ricocheting glaives now ignore obstacles
- 37.0
| “ | This part has to be included along with the Lych Soul rework with Paragons which is finally making it in this update after necessary delays. As Boomerang Paragon’s knockback hits so many times so quickly, we need to make it more reasonable when applied to targets that aren’t immediately destroyed. | ” |
| ~ Ninja Kiwi |
- Glaive Dominus anti-MOAB glaives knockback amount reduced 3 → 1
- 38.0
| “ | [...] Given the shift to more use in Boomerang Paragon with recent buffs making it more desirable we are again swapping the prices on these 2 paragons around. | ” |
| ~ Ninja Kiwi, on the "Dart Monkey" section |
| “ | [...] As mentioned above on the Dart Monkey, these Paragons are having their prices swapped around and Boomerang Paragon’s Orbit attack is having the fortification bonus damage removed as this number was so small it added no value to the tower anyway. | ” |
| ~ Ninja Kiwi, on the "Boomerang Monkey" section |
- Glaive Dominus price increased $325,000 → $350,000
- Glaive Dominus's orbiting glaives no longer deal +2 damage to fortified
- 39.0
| “ | A few buffs for the Boomerang Paragon ended up being split up and spread out over a few updates, which resulted in repeated buffs which didn’t seem so necessary after the first, given the fairly high power level it had in v38, as well as suffering less from the bug fix than the Dart Monkey, it felt like it needed more general nerfs to justify any price reduction. | ” |
| ~ Ninja Kiwi |
- ??? [buff/nerf indeterminate] Glaive Dominus's overall Boss damage undetermined
- Glaive Dominus range reduced (75 → 60)
- Glaive Dominus price reduced ($350,000 → $275,000)
- Glaive Dominus main attack boss damage multiplier reduced (60x → 50x)
- Glaive Dominus Press attack's final explosion base Boss bonus reduced (+5000 → +4000)
- Glaive Dominus Press attack's base cooldown delay increased (2.5s → 3s)
- Glaive Dominus Orbital attack base bonus Boss damage reduced (+160 → +150)
- Glaive Dominus Orbit attack radius reduced (60 → 50)
- Glaive Dominus's Ceramic damage bonuses now properly scales with Paragon degrees
- Glaive Dominus cash sacrifice per power decreased in all game difficulties
- Easy: $25 → $11.6875
- Medium: $25 → $13.75
- Hard: $25 → $14.85
- Impoppable: $25 → $16.5
- Glaive Dominus is no longer affected by the bonus sellback benefit from Favored Trades or Navarch of the Seas.
- Glaive Dominus can now accept a cash slider to fill additional cost sacrifices for a 5% price markup
- Glaive Dominus bonus Boss damage multiplier per 20 degrees increased (20% → 25%)
[]


The Boomerang Monkey Paragon (Glaive Dominus), as teased on Social Media.
Ninja Kiwi teased the release of Paragons on their Twitter page. In the build up towards revealing the concept of Paragons, Ninja Kiwi first teased the Dart Monkey Paragon on another Twitter post on July 9th 2021. The Boomerang Monkey Paragon was later teased in another Twitter post.
Both the Apex Plasma Master and Glaive Dominus were released on Version 27.0, being the first two Paragons to be released. Both of their respective names were revealed upon the release of the aforementioned update.
Quotes[]
| “ | Paragon status granted to Dart Monkey and Boomerang Monkey, unleashing the might of the Apex Plasma Master and the Glaive Dominus! | ” |
| ~ Version 27.0 patch notes |
Gallery[]
")
")
")
")
")
")
")
")
")
")
")
")
Glaive Domini[]
")
")
")
")
")
Official artwork[]
")
")
Projectiles[]
")
")
")
")
")
Animations[]
")
")
")
")
")
")
Videos[]
")
Trivia[]
- The word "Dominus" is Latin for "Lord", which means the Glaive Dominus and Glaive Lord have almost identical names.
- The name, red robe and cybernetic enhancement may be a reference to the tech priest domini of Warhammer 40,000.
- According to Ninja Kiwi's 22nd April 2022 blog, Glaive Dominus is the author of his own description.
- Glaive Dominus is the first paragon capable of supporting other towers to have its own unique buff icon.
| ||||||||||||||||||||||||||||||||||||||||||||||||||||||||||||||||||||||||||||||||||||
| |||||