| “ | You are about to attack a difficult tile, look for the number of colored dots that show how challenging a given attack will be. Anything with 4 or more dots is considered quite tricky to pass. | ” |
| ~ King Monkey explaining tile difficulty in BMC Mobile, when first attacking a tile rated Very Hard or Impoppable |
Difficulty in Bloons Monkey city is represented in dots on certain tile, difficulty is affected by city level, track difficulty, strongest Bloon on it and avaliable towers & upgrades city has.
For Round graph see Rounds (BMC)
Special mission tiles have pre-determined difficulty and are never affected with local difficulty of surrounding tiles.
Tile Difficulty[]
Trivial Difficulty[]
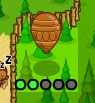
The Trivial Difficulty, also known as Very easy, is the simplest difficulty in Bloons Monkey City (Mobile). A tile with this difficulty is represented with one light green dot. Attempting to attack any of these tiles results in the player getting a warning message, asking them if they want to skip it or not. Skipping such tile gives no XP, no Bloonstones, nor Monkey Knowledge Packs, and rewards only the City Cash normally gained from it.
How to deal with trivial tiles[]
Players should avoid tiles that are ranked easy to become trivial in first place by capturing them whenever possible as leaving trivial tiles rewards less EXP and City Cash.


Easy Difficulty[]
The Easy Difficulty is the second lowest difficulty. Tiles with this difficulty are represented with 2 green dots.
How to deal with easy tiles[]
These tiles should be easy to capture and always should be captured first to prevent them to become trivial (to prevent EXP and City Cash reward loss). Even expert difficulty tracks should pose no problem to capture.
Medium Difficulty[]
The Medium Difficulty, the tile with this difficulty is represented with 3 yellow dots. These tiles are moderately difficult, Medium difficulty is default (& lowest) difficulty for My Tracks.

Hard Difficulty[]
The Hard Difficulty, the tile with this difficulty is represented with 4 orange dots. These tiles are particularly tricky to defend.
How to deal with hard tiles[]
Players should avoid tracks with Advanced difficulty due to being even trickier, unless they are well prepared.

Very Hard Difficulty[]
The Very Hard Difficulty is a difficulty represented on a tile with 5 red dots. These tiles are very challenging so the player should be well prepared to face strong Bloon retaliation.
How to deal with Very hard tiles[]
Tracks with Expert difficulty should almost always be avoided as elements in them will prove these tiles extremely difficult to defend.

Impoppable[]
The Impoppable difficulty is the hardest difficulty, represented with 5 dark red (almost black in Mobile) dots. These tiles should almost never be attempted to be captured as players may not have enough popping power to defend these tiles. This difficulty is rife in later parts of the map; tiles with this difficulty near the edges almost never drop to Very hard difficulty, so players should only attempt these tiles when they have many powerful upgrades at disposal.
How to deal with Impoppable tiles[]
Early in the game, these tiles should never be attempted to be captured, as players do not have the upgrades/popping power to attack these tiles. Impoppable (ZOMG) tiles appearing later in game are inevitable (even at max City Level) and so players should only attempt these if they have multiple powerful towers/upgrades AND are very well prepared and skilled enough.
Truly Impoppable tiles[]
Early in the game, tiles containing either camo and/or at least lead are always considered Truly Impoppable as long as the player doesn't either have towers or upgrades to pop these Bloons, requiring the player to use Red Hot Spikes to counter them (only 10 piles of 20 spikes (200 total) can be placed per battle, and later tiles tend to spawn more of these special Bloons, so even then).
Less common occurrence of a Truly Impoppable tile (often despite not explicitly stating as Impoppable difficulty) is when the player doesn't have available towers (most commonly when the player tries to attack a Hills Terrain tile with only Dart Monkeys available), in which the No Towers Available warning is given on mobile.


Special Missions[]
- Main article: Special Missions (BMC)
Bloon Strategies[]
Bloon strategies are strategy modifiers that makes these tiles particularly tricky to beat, players need to find strategies to counter these without much issue. Tiles with Bloon strategies can make a tile considerably more difficult to beat.


Camo Craziness[]
Most Bloons present in this strategy have Camo property.
- Stronger Bloons are less likely to gain Camo property.
- Occasional Camo Regrow rushes appear near the end of the game.
- In Early rounds stronger Bloons are less common and appear in smaller quantities, rather swarm of weaker Bloons appear instead.
- If the strongest Bloon is ZOMG, DDTs have a higher chance to appear and sometimes dense pack of camo ceramic bloons are able to replace a ZOMG, except for the last round.
How to deal with Camo Craziness[]
- Main article: Camo Bloon
Players need to exclusively rely on towers with camo detection in order to succeed, due to stronger Bloons appearing more later in the game players have time to set up proper defense once strong Bloons with camo property appear.
- Towers without camo detection should not be used unless player has access to monkey village with Radar Scan.
Regrow Rush of Death[]
Grouped Regrow Bloon rushes appear at end of rounds.
- Regrow Bloons appear only in the titular Regrow Rush.
- Occasionally stronger Bloon rushes appear earlier albeit in smaller quantity.
- Uncommon Camo-Regrow rushes often appear, usually made from weaker Bloons.
- If the strongest bloon is ZOMG, dense pack of regrow ceramic bloons are able to replace a ZOMG, except for the last round.
How to deal with Regrow Rush of Death[]
- Main article: Regrow Bloon
Players should utilize towers with very high DPS or raw damage. Players should avoid using towers with low pierce or slow towers with high pierce as it may cause a Regrow Farm, overwhelming defenses.
- Knockback (Distraction, Tornado) is not recommended to be used as the Bloons sent back can regrow to their cluster layer (Black/White, Zebra/Lead, Rainbow, Ceramic.)
- Glue Gunners with Corrosive Glue and/or Mortar with Burny Stuff are excellent counters against regen property as it neutralizes their regrow property, meaning once lesser Bloons appear they wont have much time to regrow back into their parent layer.
- 2-x Apprentices with Monkey Knowledge rank 4+, 3-x Engineers, and x-3 Mortars with Knowledge rank 3+ can all strip the regrow property from Bloons to an extent.
Fast & Furious[]
Large Groups of Yellow and/or Pink Bloon rushes are present throughout the strategy.
- Fast Bloon rushes increase in intensity as the game progresses.
- Similar to Round Ramp, bloons are ordered from weakest to strongest, but most of rounds start with heavy groups of pink bloons.
- Rushes are often replaced with small Rainbow rushes or even smaller Ceramic rushes.
- Once Rainbow or Ceramic become more common they replace Pink & Yellow rushes. This situation could happen when the strongest bloon is MOAB or higher.
- If the strongest bloon is a MOAB-Class Bloon, then MOABs appear more frequently instead of stronger Blimps similarly to Packed MOAB.
- If the strongest bloon is ZOMG, DDTs have higher chance to appear.
How to deal with Fast & Furious[]
Towers with numerous projectiles or high attack speed are preferred. Players should reduce all Yellow and Pinks as fast as possible to more manageable greens or lower. Since this strategy primarily spams fast Yellow, Pinks throughout the game, stronger Bloons appear in smaller quantity.
This strategy is primarily dangerous in early game when towers don't have much popping power to tackle Yellow or Pinks.
- Tack Shooters are an excellent tower to thanks to their relatively fast speed and numerous tack attack. When water is present Monkey Buccaneer's Grape shot should be also used.
- Its not recommended to use Glue Gunner without Glue Splatter due to sheer amount of Yellow/Pink strategy sends.
- Ice Monkey with Permafrost upgrade can slow some speedy Bloons into more manageable speed, although its not reliable on its own.
- Dartling Gunners are effective at dealing with groups of Yellow and Pink Bloons, especially when multiple are present.
Hard & Heavy[]
Lead & Ceramic Bloons are more common, Stronger MOAB-Class Bloons appear earlier.
- Lead & Ceramic Bloons appear earlier albeit in smaller quantity.
- Camo and/or Regrow Lead & Ceramic are more common.
- Strategy primarily focuses sending Lead & Ceramic Bloons but weaker Bloons appear in quantity to compensate.
- Speedy (Yellow & Pink) Bloons are less common.
- In early game a single ceramic can appear very early on round 3 on harder difficulties.
- Stronger MOAB-Class Bloons appear earlier, but less frequently throughout the game.
- If the strongest bloon is ZOMG, dense pack of ceramic bloons or grouped BFBs are able to replace a ZOMG, except for the last round.
How to deal with Hard & Heavy[]
Players should utilize strong single target powers with either strong DPS or raw output.
- Towers such as Sniper Monkey & Glue Gunners are excellent as Glue Gunner excels well at slowing early single ceramics while Sniper excels at dealing huge damage to reduce Bloons into more manageable layers.
- Bloonchipper can stall small amount of ceramic Bloons until their shell is destroyed, although this strategy is vulnerable to Regrow Bloons.
- Ice Monkey's Snap freeze can easily remove lead Bloons as threat when placed well.
Cash Starve[]
Strong Bloons are replaced with weaker Bloons in early rounds.
- Early rounds primarily spawns reds and other weak Bloons, rarely sending anything above a Black or White Bloon.
- After early game ends stronger bloons appear in small groups roughly equal to lost cash.
How to deal with Cash Starve[]
The early game in this strategy is relatively easy so players can place cheaper towers to deal with early rounds composing of weaker Bloons, players should keep in mind that after some rounds a Bloon rush with strong Bloons may appear, taking defenses by surprise. Its advised to plan defenses accordingly and planning beforehand.
- Monkey Engineers are very cost efficient, thanks to their Sentries helping as extra backup defense, however they cannot adapt well against certain types of Bloons such as Lead or very large rushes of Bloons.
- Banana farms while useful source of early income aren't recommended as player are put in risk due to their even more limited funds now. (As banana farms take time to pay themselves back).
Camo Regrow Pain[]
Many Bloons present in this strategy have both Camo & Regrow property combined.
- No camo or Regrow spawn before round 6
- All Bloons that have Camo also have Regrow & vice versa.
- Stronger Bloons usually don't get Camo Regrow Property.
- Camo-Regrow Rushes are very common but are usually are made from weaker Bloons.
- Once ceramic bloon rushes start appearing the Camo-Regrow Bloons stop spawning.
- Camo Regrow Ceramic Bloons very rarely appear.
- When the strongest bloon is ZOMG, then dense pack of camo regrow rainbows or camo regrow ceramics can occur more often once ZOMG starts to spawn.
How to deal with Camo Regrow Pain[]
It's very similar to Camo Craziness and Regrow Rush in terms of properties. Players should not worry about Camo or Regrow until round 6 starts as no Camo or Regrow appear before it. Players should utilize similar strategies to aforementioned strategies.
- During the grace period, players should prepare their defenses against Camo Regrow Bloons.
- Similar to Camo Craziness players should use Ninja Monkeys & Dart Monkeys.
- Towers without camo detection should not be used unless player has access to Monkey Villages with Radar Scan.
Cluster Chaos[]
Lots of grouped Bloons appear in this strategy but with shorter rounds.
- Grouped Bloons are much more common.
- Very dense Bloon packs appear.
- Stronger Bloons appear less often during early game.
- If strongest Bloon is ZOMG then Rainbows, Ceramics, MOABs & BFBs appear more frequently.
- DDTs have a higher chance of appearing on harder ZOMG tiles with this strategy.
How to deal with Cluster Chaos[]
Towers with high pierce such as Bomb/Mortar tower, Boomerang/Engineer/Dart Monkeys. are recommended here thanks to their high pierce options. Packed Cluster Bloons (Black/White/Zebra etc.) may prove to be troublesome so adding backup support is required to handle these.
- During early game players should only use Bomb Shooter if they have enough funds as their slow attack speed means that are less reliable poppers, so players should support them with more reliable towers.
- Dartling Gunners are excellent thanks to their unlimited range and moderate pierce per each dart to handle Bloons closest to the exit. They can be further upgraded to Hydra Rocket Pods to take care of the Bloon groups more easily.
- Engineer Monkeys with 9 inch Nails upgrade are viable options if placed in path to maximize its pierce, sentry guns can help dealing with early Bloons.
Round Ramp[]
Bloons are ordered from weakest to strongest in each round.
- Every round resets in ordering from weakest to strongest. (Still follows regular formula of Bloon spawning).
- Intensity increases as round progresses, never decreasing as minimum & maximum Bloon rank increases.
How to deal with Round Ramp[]
This Bloon strategy is generally easy to handle as strong Bloons appear near the end of each round. Spike Factory barriers can significantly reduce the threat of stronger Bloons with spike stockpiling. Sniper Monkeys are also more effective near the end of the rounds because their attacks can destroy stronger Bloons in just 1 attack when upgraded.
MOAB-Class Bloon Strategies[]
These strategies are modified versions which primarily affects MOAB-Class Bloons, these strategies only appear when strongest Bloon on a tile is ZOMG.
MOAB Push (only in MvM in BMC Mobile)
A MOAB will come in early as possible.
- Ceramics come in earlier rounds than normal.
How to deal with MOAB Push
Have towers with high DPS or Raw damage. This includes Boomerang Monkeys, Dart Monkeys, and Ninjas.


DDT[]
Dark Dirigible titan appear in this strategy.
- 1 DDT always appear near the end of the game. (Early DDT tiles).
- DDTs are more common on higher difficulties. (More DDTS appear on higher difficulty).
- ZOMGs may rarely appear, usually at or near the end of the game on higher difficulties.
How to deal with DDT[]
- Main article: DDT
This Bloon strategy can prove troublesome as DDTs are challenging Bloons to pop as they possess the properties of a Camo Bloon, Lead Bloon, Black Bloon, and are the fastest MOAB-Class Bloon. Upon destruction it spawns 6 Camo Regrow Ceramic Bloons, but its children cannot regrow back to its parent. (Strangely enough they don't possess Black or Lead property in mobile version.)
- DDTs outside of their quick speed and camo property aren't a huge threat as large stockpiles of Spikes is enough to destroy them, the resulting children can cause issues when not dealt with quickly. Cleansing foam removes its camo (& regrowth from its children).
- Monkey Intelligence Bureau renders its resistances useless making it vulnerable to Moab Maulers and other forms of attacks to damage it.
- DDTs outside of their tiles are very rare to appear on tiles with ZOMGs as the strongest Bloon, but appear much more commonly on certain Bloon strategies.
Packed MOAB[]
Very large rushes of MOABs appear in this strategy.
- This strategy functions identically to Fast & Furious and Cluster Chaos.
- MOABs are primarily spawned in dense packs.
- BFBs & ZOMGs are less common.
- Stronger MOAB packs appear as the game progresses.
- ZOMGs can appear in this strategy on higher difficulties, usually near the end of the game.
How to deal with Packed MOAB[]
This strategy functions identically to Fast & Furious and Cluster Chaos, Packed MOABs can be really dangerous as while at speed of a Red Bloon they are still faster than other MOAB-Class Bloons (only beaten by DDT) so they can get past your defenses relatively easily not to mention their children can easily overflow a unprepared defense. As when MOABs appear earlier this can prove to be more challenging.
Packed BFB[]
Large rushes of BFBs appear in this strategy.
- This strategy functions identically to Hard & Heavy and Cluster Chaos.
- BFBs are more common.
- MOABs are less common later in the game.
- Stronger BFB rushes appear as the game progresses.
- ZOMGs can appear in this strategy on higher difficulties, usually near the end of the game.
How to deal with Packed BFB[]
This strategy functions identically to Hard & Heavy and Cluster Chaos. BFBs are more common throughout this strategy, this strategy is generally easier as BFBs while tankier are also significantly slower allowing to be hit for much longer, and they appear later than their lesser counterpart MOABs.
Radius of Bloons[]
Beyond where the town hall, farms, and other starting points are, there is a certain range of Bloon types away from the 9 starting tiles.
| # | Bloons Shown |
|---|---|
| 1 | Red |
| 2 | Red, Blue, Green, |
| 3 | Green, Yellow, Pink |
| 4 | Green, Yellow, Pink, |
| 5 | Pink, Black, White, |
| 6 | Lead, Zebra, Rainbow, |
| 7 | Zebra, Rainbow, Ceramic |
| 8 | Zebra, Rainbow, Ceramic, |
| 9 | Rainbow, Ceramic, MOAB, |
| 10+ | Rainbow, Ceramic, MOAB &
BFB (both packed), ZOMG, |
| |||||||||||||||||||