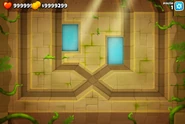
Chutes is an Intermediate Map in Bloons TD 6. It was one of 5 Intermediate Maps to be introduced on initial release, and was one of the 21 original maps introduced on initial release.
Overview[]
A temple map. Bloons come out starting on the left path, then alternates each round. Therefore, every odd round comes out from the left path, and every even round comes out from the right path.
There are two rectangular lakes nearby the end of the track, allowing water towers such as Monkey Buccaneers and Monkey Subs to be placed there. On the vertical perimeters of the map, there is a sloped edge where no towers may be placed there.
There are two statues of monkeys in the middle, which players can remove for $350 each. Otherwise, they can block the sight of monkeys.
Rewards[]
Strategy[]
- Main article: Chutes/Strategies
| WIP This section or article is currently a work in progress (WIP), and therefore under construction. Please bear with us while our editors improve the page. |
| Feel free to replace the "TBA" with some basic strategies that optimize the given map |
Summary[]
Chutes is an incredibly difficult map to beat if you are an inexperienced player, which is why it is strongly recommend you avoid looking at it until you have gotten to the Advanced maps. Here are some general pointers for all difficulties:
- Place three Dart Monkeys on the bottom of the intersection, which will help you through the starting rounds. After, place a Ninja Monkey on the top of the intersection, which helps the Dart Monkeys, who will otherwise struggle with the increasing bloon waves.
- Remove the statues as soon as sustainably possible. This opens up space for more towers on the intersection point, which is vital in order to control the later rounds.
- Additionally, this clears up line of sight for towers like Snipers and Dartling Gunners.
- Full screen towers like the Heli Pilot, Monkey Ace (ODS and Neva-Miss Targeting) and Dartling Gunner are useful once one can afford to purchase them. Though for the latter, don't forget to switch its lock position if you are using locked targeting.
- Knockback-Plasma Blasts/Sun Avatar is incredibly useful if placed at the intersection.
- Advanced Intel Monkey Subs are, as usual, a pretty good strategy whenever a body of water is present. Paired with potential Triple Guns spam and a Sub Commander will wreck later rounds. Ensure you add a Monkey Intelligence Bureau near either one or both pools if you aim to clean up D.D.Ts.
- Admiral Brickell is not recommended, though, as she will be unable to hit on both tracks.
- A Plasma Accelerator/Ray of Doom shooting along the first straight line of the track could deal a lot of damage to regular bloons, easing out the pressure on other towers especially on rounds with Bloon rushes (like round 63), because it can damage all Bloons that pass through the beam simultaneously.
- Alternatively, if short of cash, one or two Juggernauts could also work, because they pop all Bloon types, have high pierce and deal extra damage to Ceramic Bloons, but the Plasma Accelerator is still the best solution.
- This strategy also works on the end stretches, because they are straight too. In this case, though, the Plasma Accelerator may not be needed, a Juggernaut could be enough to pop any Bloons that escape.
Tips[]
- As an alternating lane map with only one active lane per round, Heli Pilots are a solid choice on this map.
- Sauda is able to start a game of CHIMPS on this map.
Sounds[]
When removing a statue:
- [???]
- [Helicopter flying]
- [Picking up towers]
Gallery[]
Trivia[]
- This map is considered by many to be one the hardest of the Intermediate Maps in the game, if not, the hardest, due to the two short paths. Other candidates include Rake, Haunted, Adora's Temple, and Bazaar, but most notably, Bloonarius Prime
References[]


![Chutes beta.png (528 KB) Beta version of Chutes[1]](https://static.wikia.nocookie.net/b__/images/a/a8/Chutes_beta.png/revision/latest/scale-to-width-down/185?cb=20211111001318&path-prefix=bloons)