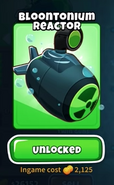
| “ | Submerge to detect Camo, pop Bloons and reduce ability cooldowns of nearby water-based Monkeys by 15%. | ” |
| ~ Upgrade description in BTD6. |
Bloontonium Reactor (sometimes shortened to Reactor or Reactor Sub) is the fourth upgrade of Path 1 for the Monkey Sub in BTD6. It allows the sub to reveal Camo Bloons, in the same way as Submerge and Support, but when submerged, it will also pop bloons within its radius. As a bonus, it reduces water tower ability cooldowns (First Strike Capability and Monkey Pirates, as well as the Pirate Lord ability) by 15% if they are within its radius. It should be noted that the cooldown bonus does not stack with other Bloontonium Reactors, while Energizer benefits take priority if one Energizer is present. Submerged Bloontonium Reactors also block Regrowth in its range, similar to the Monkey Village's Grow Blocker upgrade.
It costs $2125 on Easy, $2500 on Medium, $2700 on Hard, and $3000 on Impoppable.
Tips
- A submerged Bloontonium Reactor can decamo an infinite amount of bloons per decamo pulse. However, the radioactive attack itself only has a base pierce of 70. This can be increased to 84 with the Barbed Darts upgrade.
- The submerged Sub's attack does not stack with other Subs in the radius. The exact mechanic preventing this is unknown.
- If switching between Submerge and another targeting option at correct speeds, the Bloontonium Reactor can apply both attacks, increasing the overall DPS of the Reactor.
- Submerging a Bloontonium Reactor has a very quick decamo pulse rate; it decamos bloons in range every 0.3 seconds, enough to decamo virtually any bloon passing by. When combined with Path 3 cross-pathing, not only will this increase the decamo pulse rate, it will also increase the radioactive attack with it.
- As of Version 18.0, crosspaths for submerged Bloontonium Reactor do matter. 4-0-2 is overall better, as this will benefit its submerged radioactive attack more than its already high pierce, and the additional pierce and lead-popping damage from Heat-Tipped Darts does not provide as much of a benefit.
- On most occasions though, 4-0-0 is enough, as the tower doesn't do much damage in the late-game.
- However, it's worth noting that a submerged 4-0-2 Bloontonium Reactor can solo regular bloons below Ceramic with ease, while support may be required to make it easier to pop the Ceramics.
- Using the Reactor to decrease ability cooldown of First Strike Capability allows for an easier double First Strike activation, especially on shorter maps or where the First Strike can only be bought very late.
- Do note that using the Reactor as the main decamo tower may have issues on Round 100, where the BAD can pop at an unfavorable spot releasing DDTs that are not decamoised.
Update History (BTD6)
- 2.0
![]() Bloontonium Reactor pierce increased (30 → 70).
Bloontonium Reactor pierce increased (30 → 70).
- 18.0
 Bloontonium Reactor has more range (50 --> 52)
 4-1-0 Submerged Reactor Sub gains 20% increased pierce from 70 -> 84
 4-2-0 Submerged Reactor Sub deals +1 damage to Leads
 4-0-1 Submerge and Support Sub gains increased damage pulse rate (0.3s -> 0.255s)
 4-0-2 Submerge and Support Sub gains increased damage pulse rate (0.3s -> 0.19125s)
Gallery
Trivia
- In BTD5, the Bloontonium Reactor had infinite popping power. In BTD6, however, the damage pierce was reduced to 70 per pulse (or 30 prior to Version 2.0).
| ||||||||||||||||||||||||||||||||||||||||||||||||||||||||||||||||||||||||||||||||||||||||||||||||||||||||||||||||||||||||||||||||||||||||||||||||||||||||||||||||||||||||||||||||||||||||||||||||||||||||||||||||||||||||||||||||||||||||||||||||||||||||||||||||||||||||||||||||||||||||||||||||||||||||||||||||||||||||||||||||||||||||||||||||||||||||||||||||||||||||||||||||||||||||||||||||||||||||||||||||


